39 Bohemian Living Room Projects for a Weekend
A boxed boho set from a big retailer is the fastest route to a bohemian living room that looks like everyone else’s. Handmade pieces, even slightly wonky ones, carry the irregular texture the style depends on.
This list gives you 39 projects, each with a difficulty level, a time estimate, and the tools involved. Most need nothing more than scissors, glue, and a free Saturday afternoon.
Bohemian living room: The vision board
A bohemian living room works best when no two pieces match but all of them share a few earthy colors. Pick a palette of three (rust, cream, and a deep green, say) and let every project below pull from it.
A 36-inch macrame wall hanging
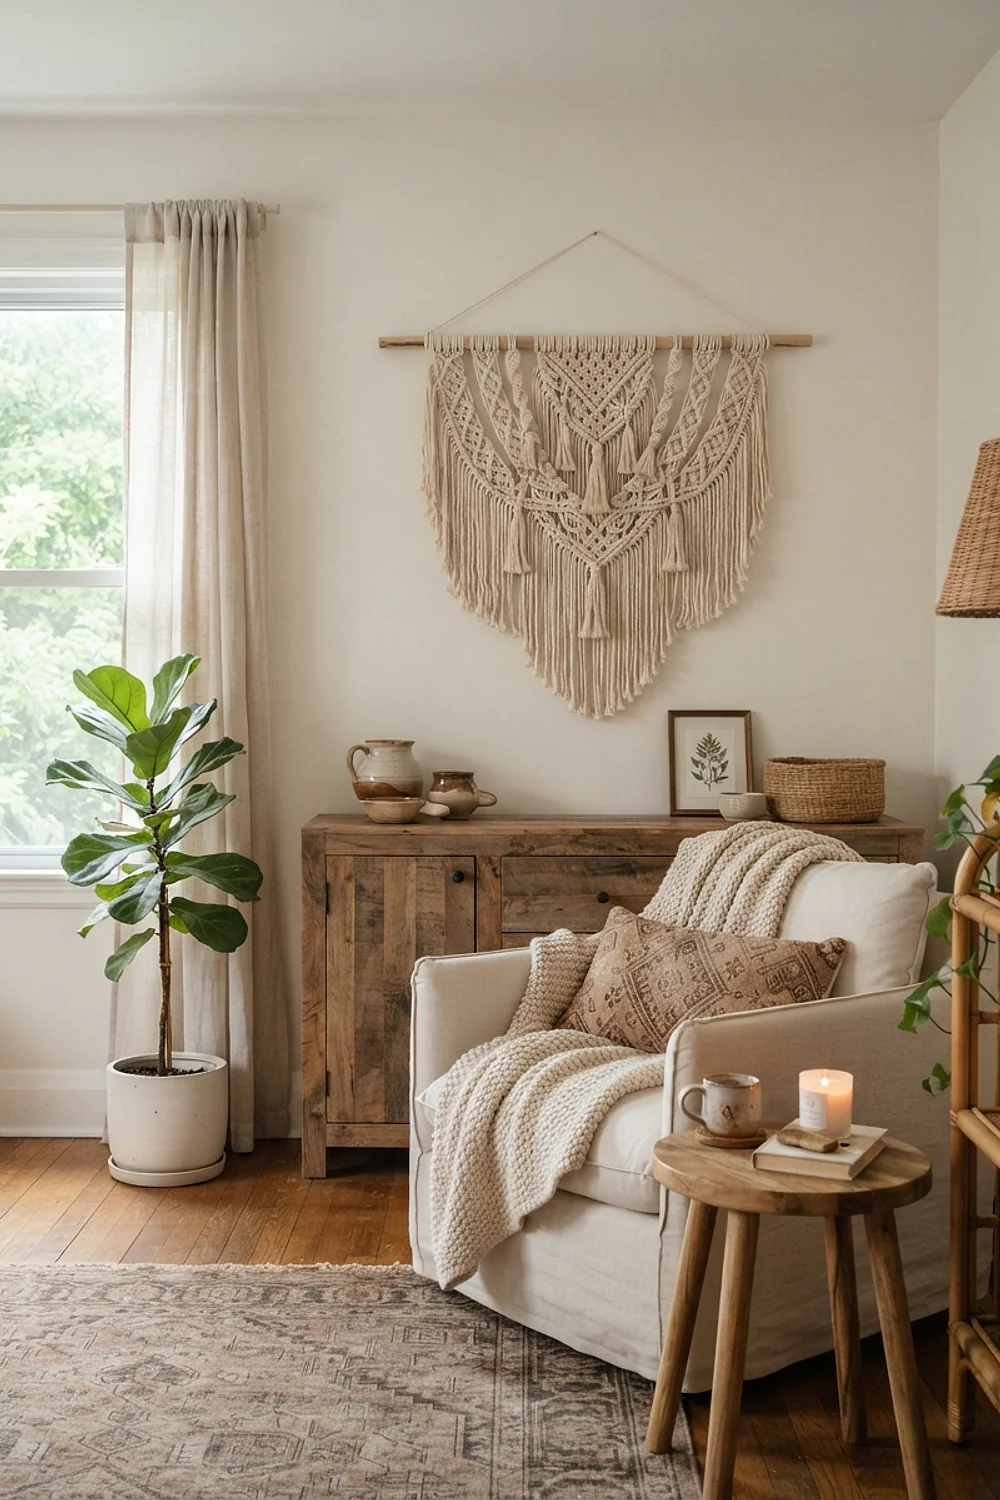
Cotton cord at 3mm, hung so its center sits about 57 inches off the floor, anchors a bare sofa wall better than a framed print. Let it span roughly two-thirds of the sofa’s width.
Beginner level, around 90 minutes. Scissors, a 12-inch dowel, and a tape measure are all you need, since square knots and spiral knots cover the whole pattern.
The common mistake is cutting strands too short. Each one needs about four times its finished length, because knotting eats cord fast.
Terracotta pots dipped in matte paint
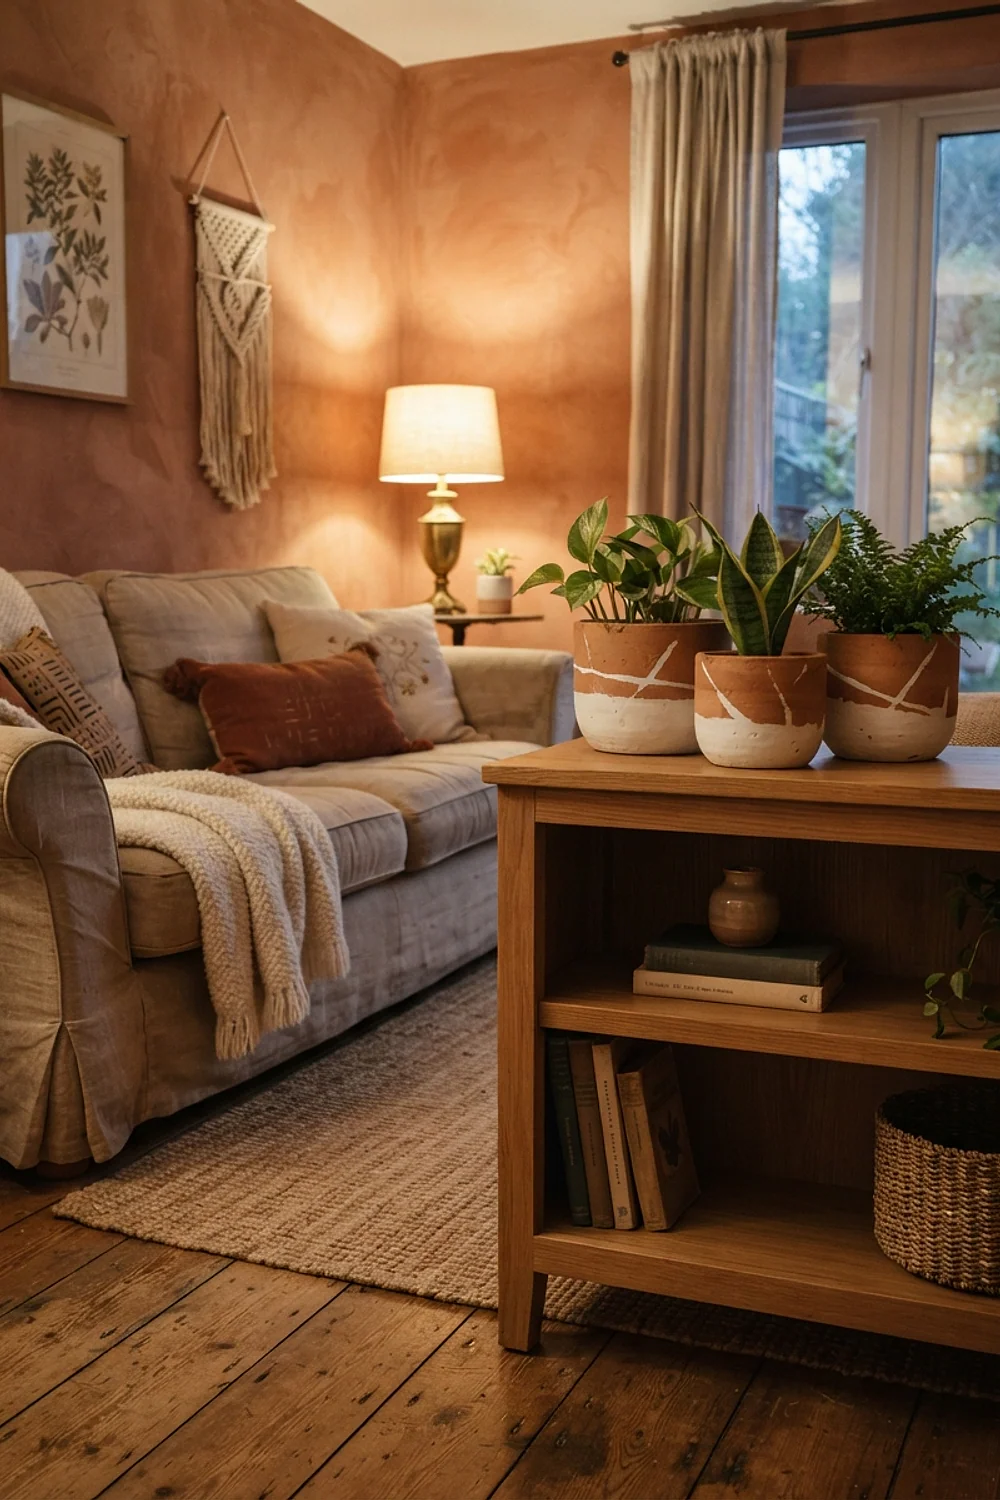
Six 6-inch terracotta pots cost about $18 at a garden center, and dipping only the bottom halves in rust, ochre, and cream acrylic leaves the raw clay showing above. That unglazed pink-orange body acts as the fourth color.
Beginner level, about 40 minutes plus two hours of drying. Painter’s tape gives a crisp line, and a cheap brush does the rest.
Keep paint off the inside rim. Moisture wicks through clay and blisters any paint it reaches, so the inside should stay bare.
Fringe trim glued onto plain cushion covers
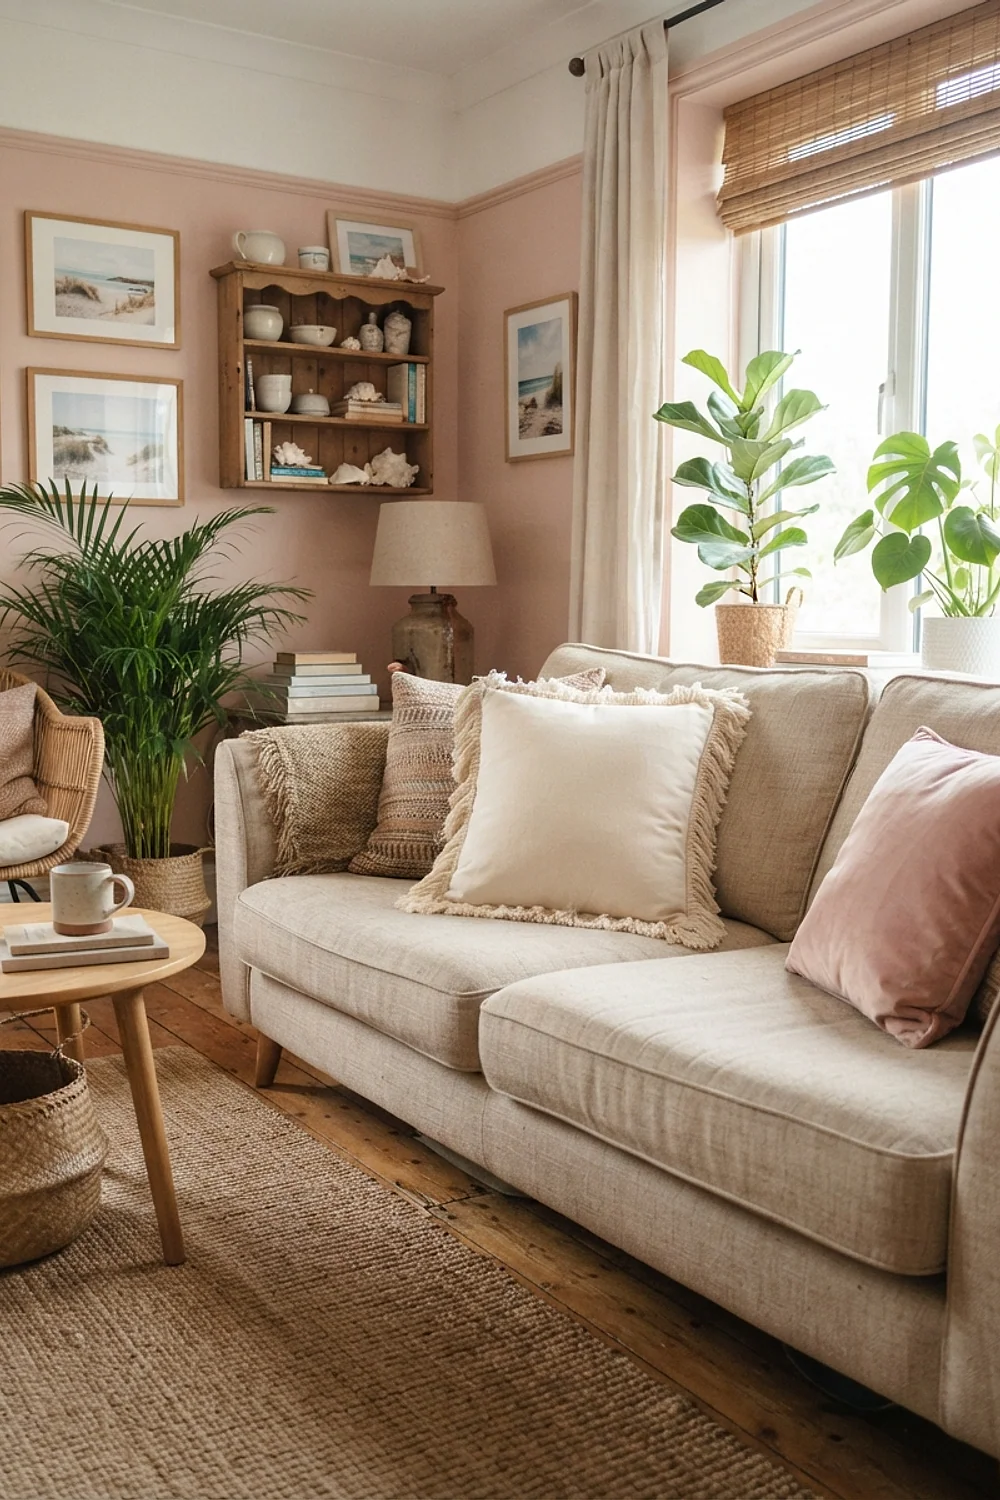
A 2-inch cotton fringe along the bottom edge breaks the flat rectangle of a store-bought cover and makes a basic linen square read as custom. Iron-on hem tape holds it without a single stitch.
Beginner level, about 30 minutes per cover. You need scissors, an iron, and a strip of tape.
Check the cover’s weight first. Trim heavier than the fabric makes the edge sag, so thin cotton needs a strip of interfacing ironed behind the seam.
A stuffed pouf from a zippered cover
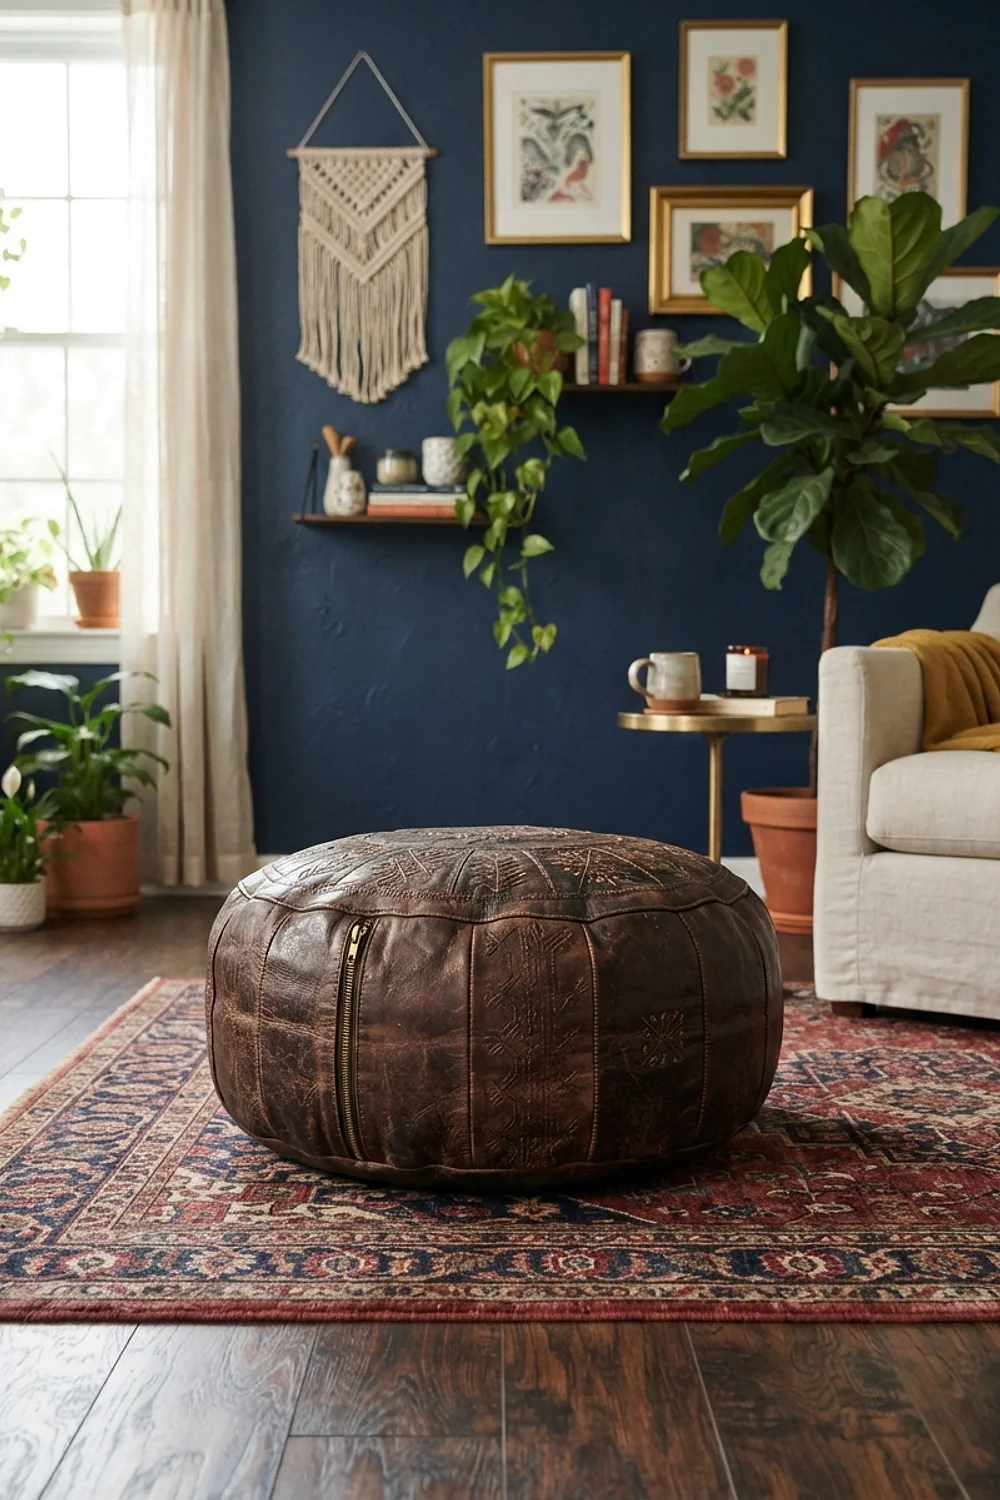
A 20 by 14 inch unstuffed pouf cover turns into extra seating, a footrest, or a side table once a tray sits on top. It earns its floor space in a living room too small for a second armchair.
Beginner level, 45 minutes, and no tools. Two trash bags of clean old T-shirts and fabric scraps do the filling.
Pack it until it resists a firm hand push. Stopping at 80 percent full leaves a pouf that slumps flat within a week.
A twine-wrapped paper globe pendant
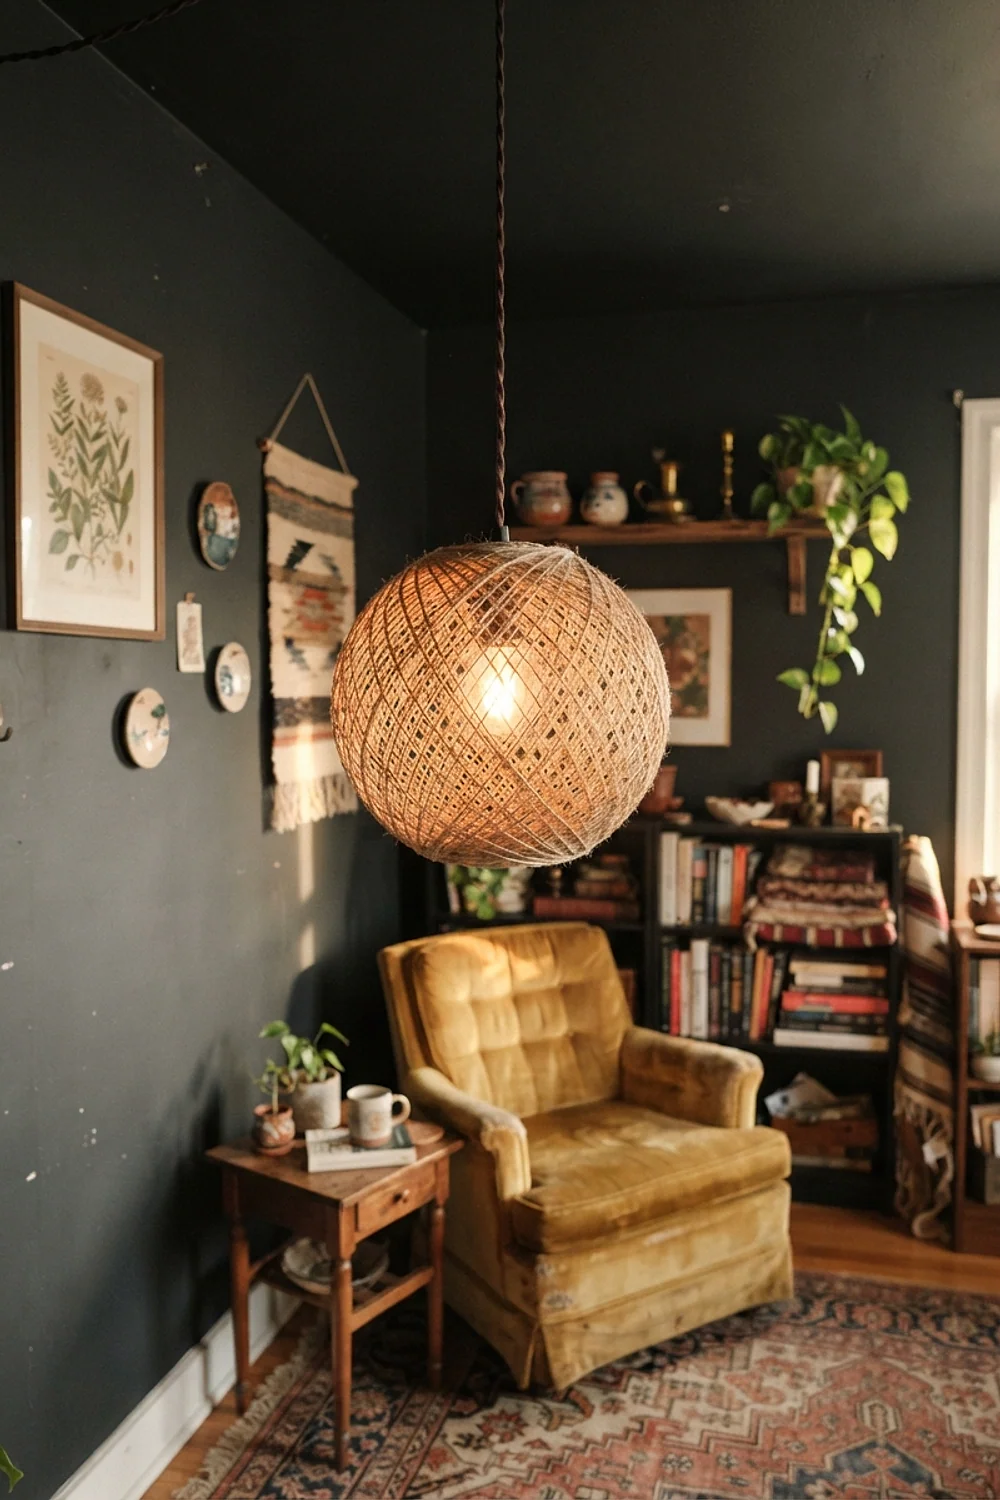
An 18-inch paper lantern wrapped in jute twine throws a soft, speckled glow, and it does so at ceiling height, where most boho rooms feel dim. A plug-in cord kit handles the wiring.
Beginner level, about an hour. Use scissors, glue, and an LED bulb in the 2200-2700K range, kept an inch off the paper.
Here’s a counterintuitive point: cool-white bulbs make rust and terracotta read as muddy brown. A 2200K bulb keeps those colors rich after dark.
A cane webbing panel set into a cabinet door

Cane webbing sells by the foot for roughly $12-15, and swapping it into a flat cabinet door gives a plain media console real texture. Soak it in warm water for 20 minutes until it bends without cracking.
Intermediate level, about two hours. You need a utility knife, wood glue, clamps, and a screwdriver to remove the door panel.
Dry cane smells faintly of hay and crackles when bent. Leave a 1-inch overlap on every side, and keep the cabinet tidy, since open weave hides nothing.
A 48-inch fabric tapestry hung from a dowel
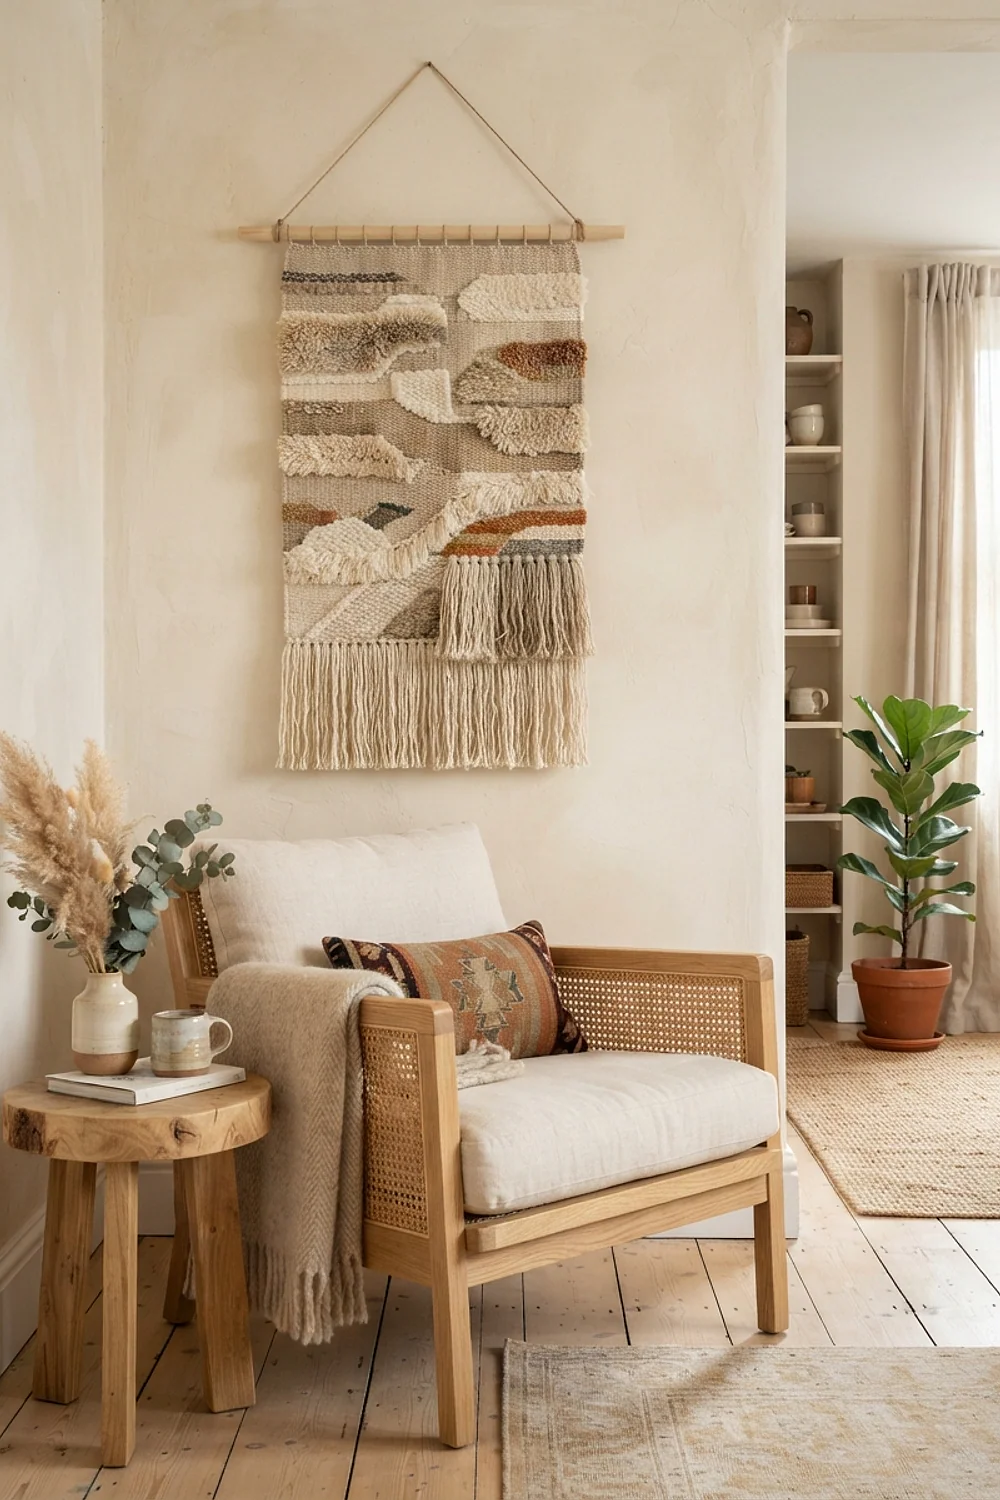
A tapestry on a 1-inch dowel suits rooms with 9-foot ceilings, where small art floats and disappears. Go at least two-thirds the width of the sofa below it.
Beginner level, 30 minutes. Hot glue or a few stitches make the top pocket, and a length of jute cord does the hanging.
Anything narrower than about 40 inches looks like a bath towel pinned to the wall. Size up before you start cutting.
Rope plant hangers at the right height
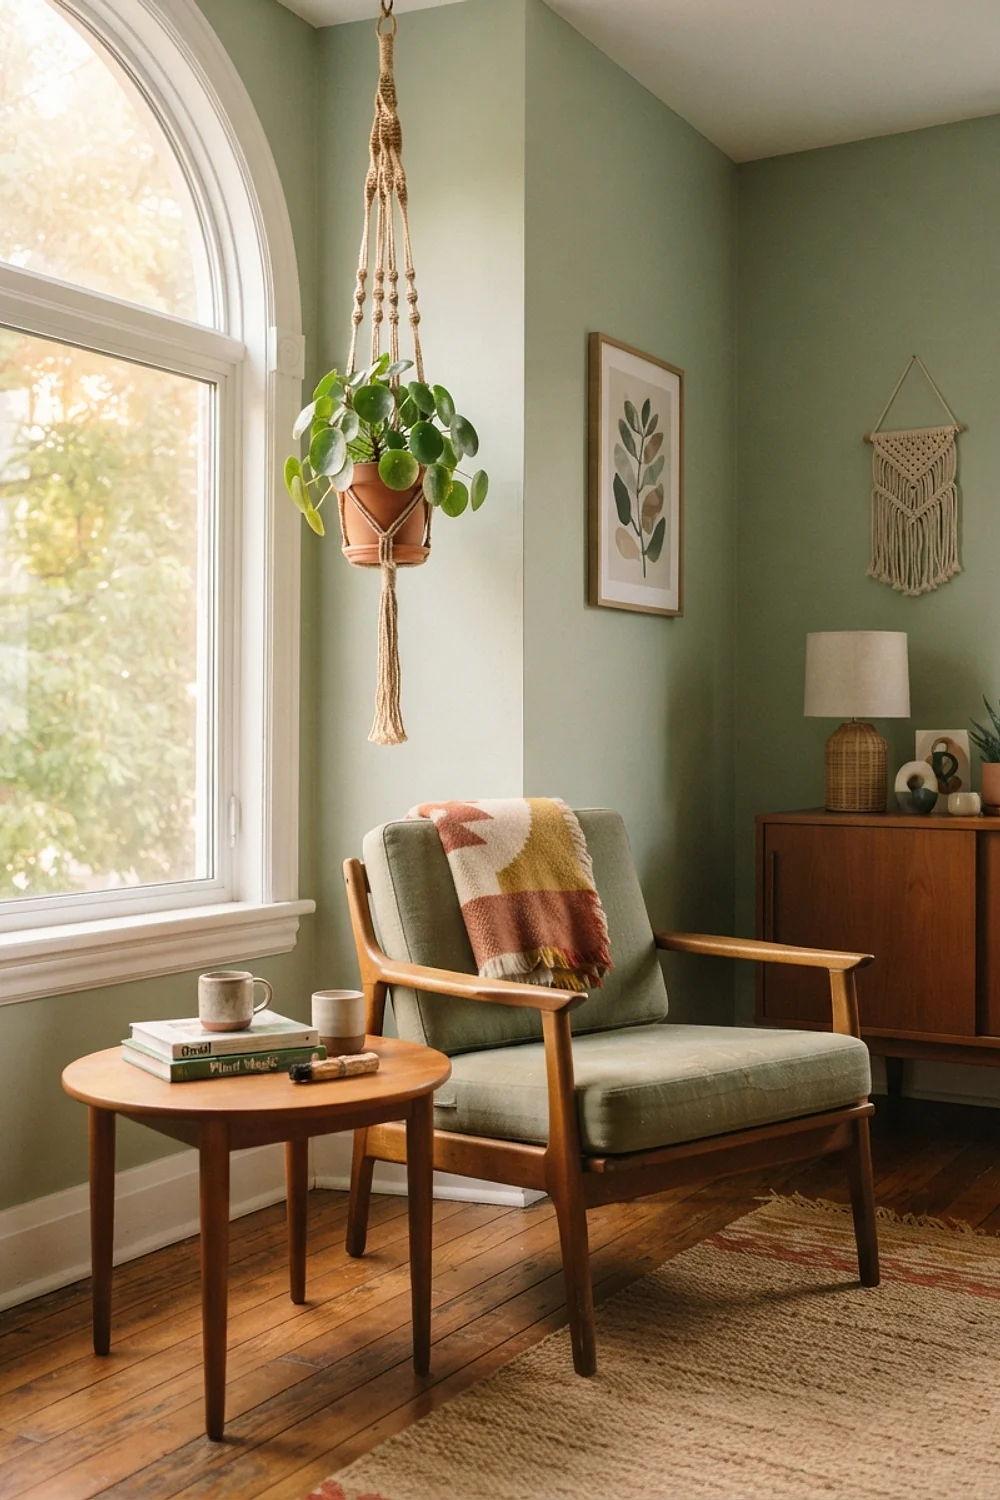
A trailing pothos in a rope hanger should dangle at about eye level, so the lowest leaves clear a seated person’s head by a foot. In a room with 8-foot ceilings, that means a hook roughly 6.5 feet up.
Beginner level, 25 minutes. You need scissors, a stud finder, and a ceiling hook.
A watered 8-inch pot weighs 8-10 pounds. Screw the hook into a joist or use a toggle rated for 50 pounds, never a plain drywall anchor.
A window bench cushion cut from 3-inch foam
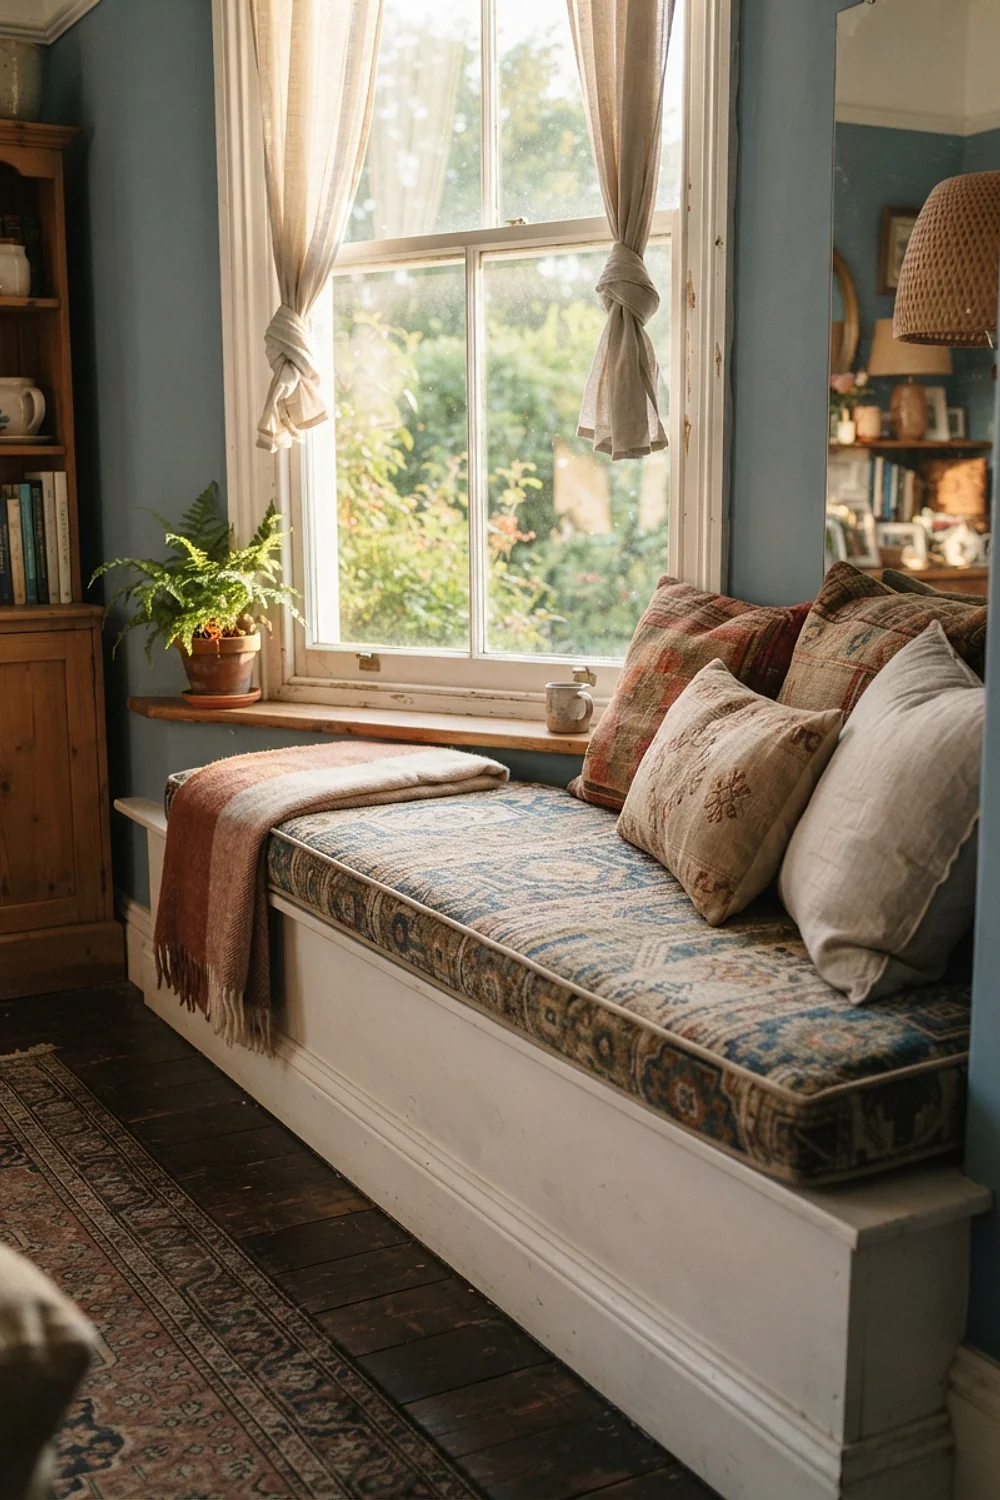
High-density foam at 3 inches thick supports a person sitting for half an hour or more. A 1.5-inch pad bottoms out against the board and gets uncomfortable fast.
Intermediate level, about two hours. Mark the foam, cut it with a serrated blade, and wrap it in a canvas envelope cover.
Wrap a layer of polyester batting around the foam before covering it. That rounds the edges and keeps the corners from poking through the fabric.
A crate shelf for records and books
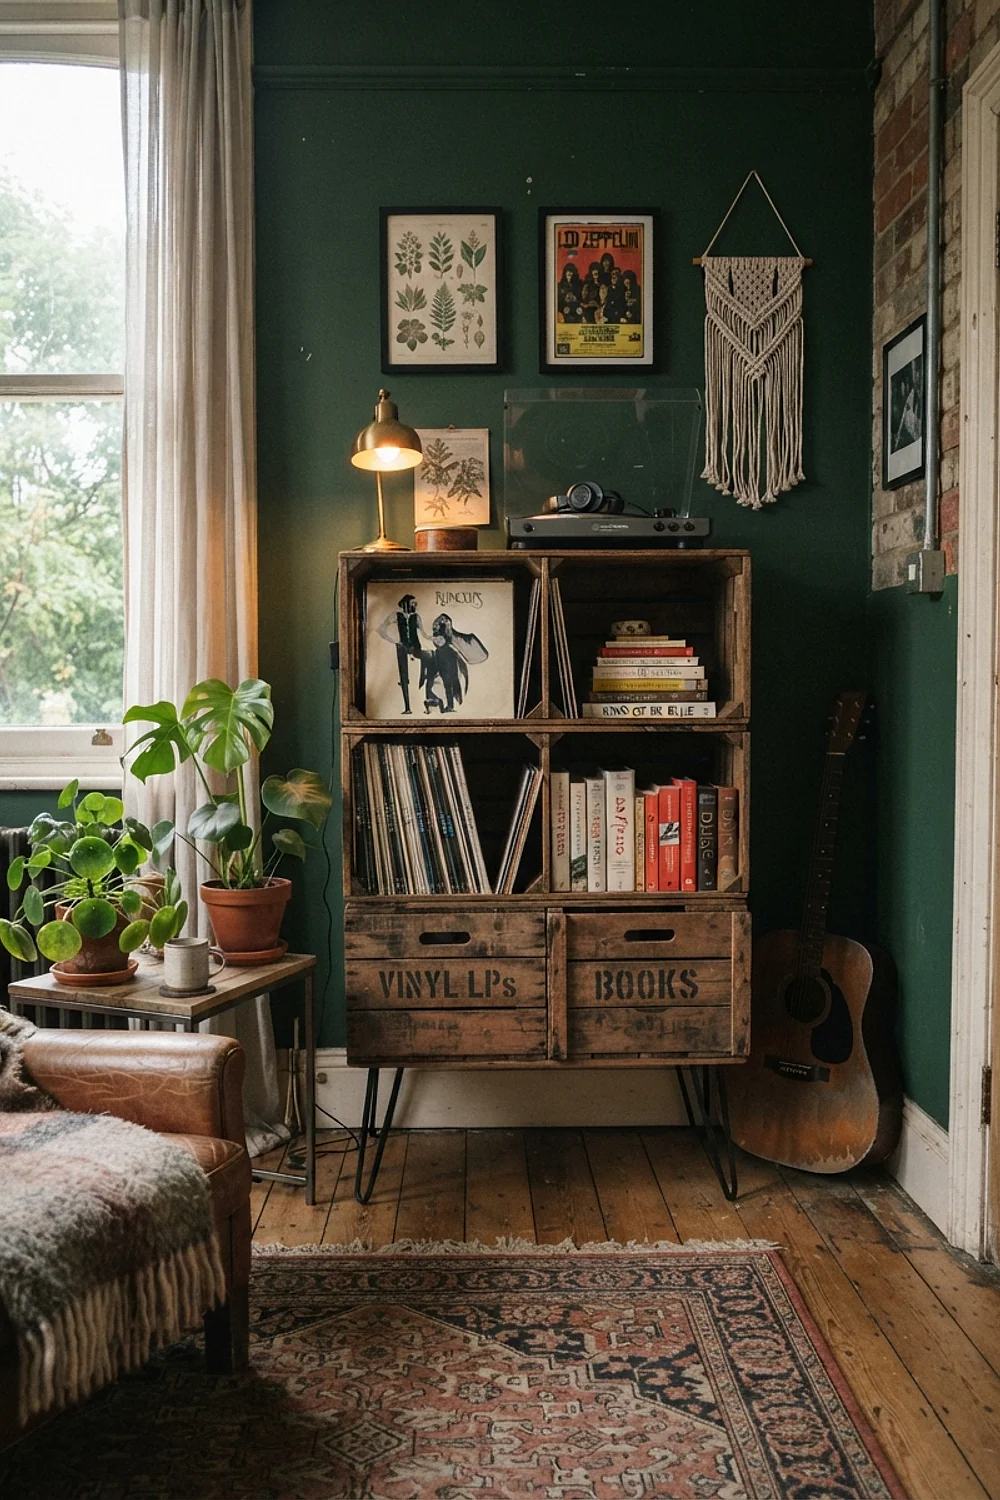
Four wooden crates at roughly $10-14 each, stacked two high and screwed together, make a record shelf that holds 12-inch LPs. Most crates measure about 13 inches square inside, which is just enough.
Beginner level, one hour. You need 1.5-inch wood screws, a screwdriver, and sandpaper for splintery edges.
Never stack three high without securing it. An L-bracket into a stud keeps a top-heavy tower from tipping onto a toddler.
A gallery wall of frames sprayed brass
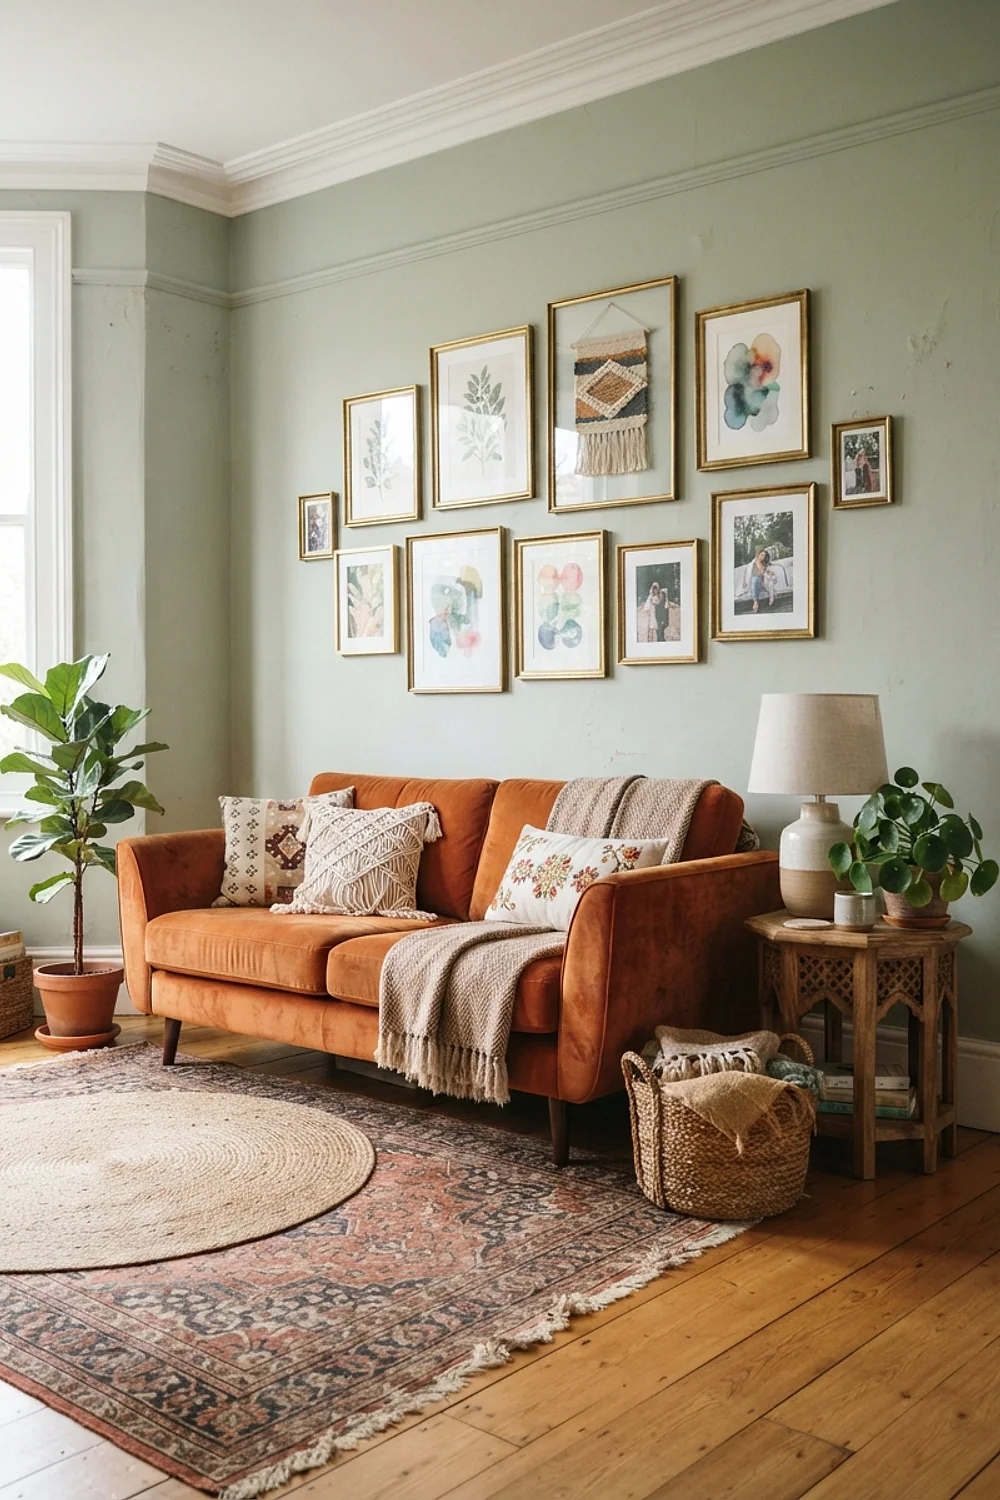
Mismatched thrifted frames sprayed in one metallic finish read as a collection instead of clutter. Trace each frame on kraft paper and tape the templates up first, then shuffle them until the arrangement works.
Beginner level, about two hours. Painter’s tape, a level, and a can of brass spray paint cover it, and the spraying belongs outdoors.
Anchor the cluster around one large frame and keep the outer edge roughly rectangular. Even scattering across a wall looks accidental in the wrong way.
A painted terracotta arch behind the sofa
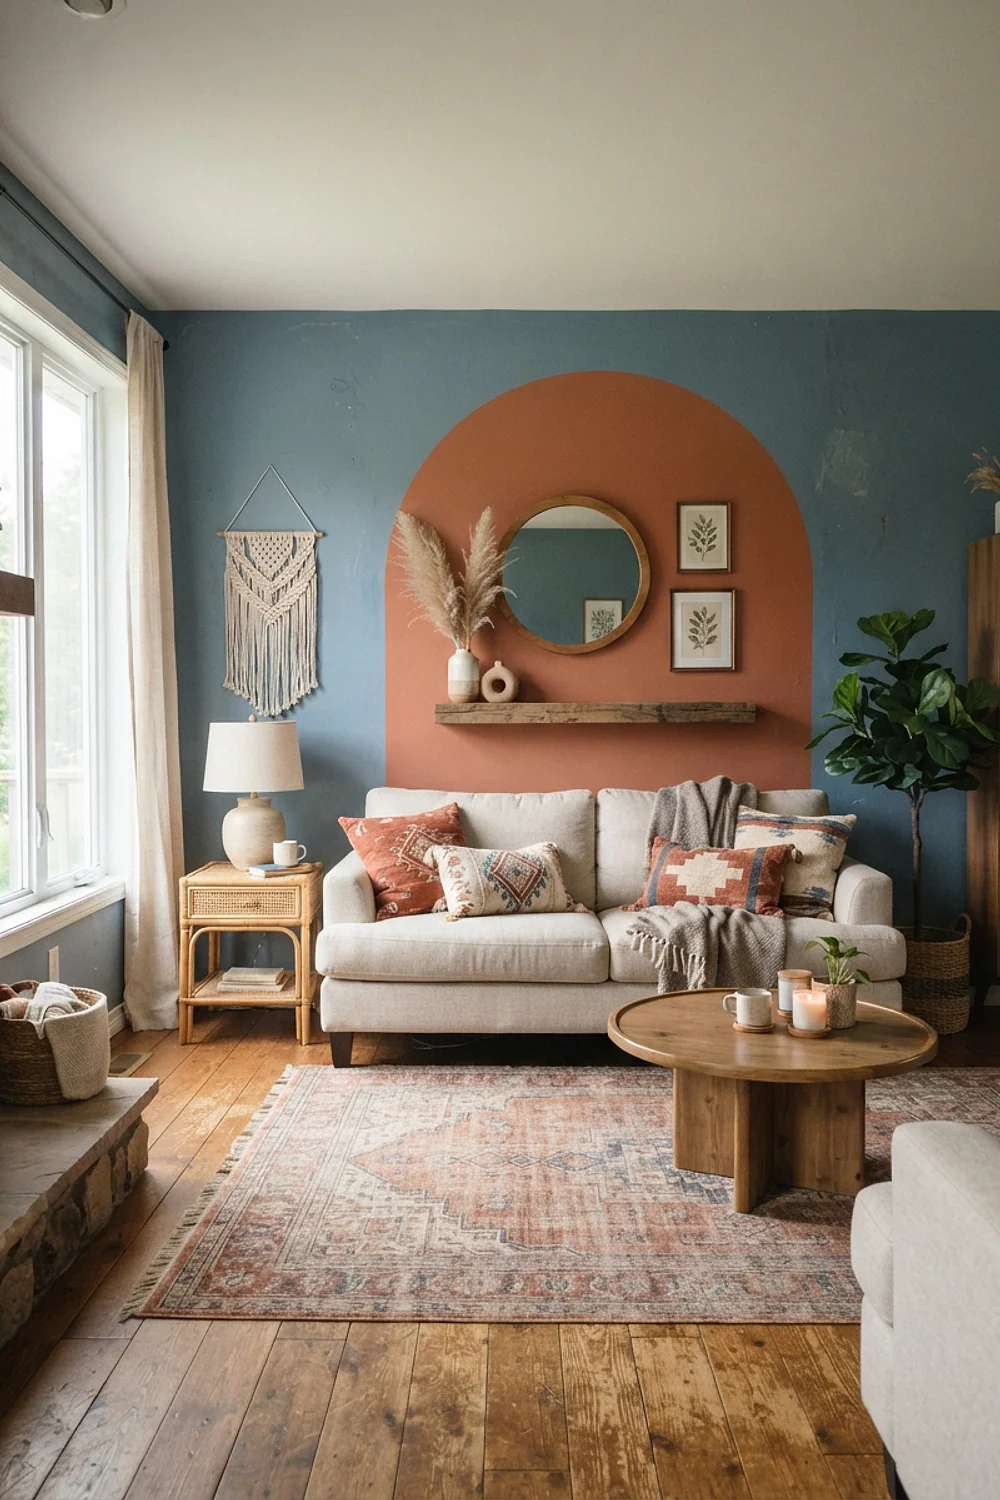
A 60-inch-wide arch, 72 inches tall at its peak, frames a sofa like a headboard frames a bed. Pull the paint from your existing room colors so the arch feels planned.
Intermediate level, about three hours with drying. Tie a string to a pencil at a 30-inch radius to draw the curve, then tape and paint with a 2-inch angled brush.
Seal the tape edge with a thin coat of the wall color first. That blocks bleed and gives a razor-straight curve.
A tassel garland in cotton yarn
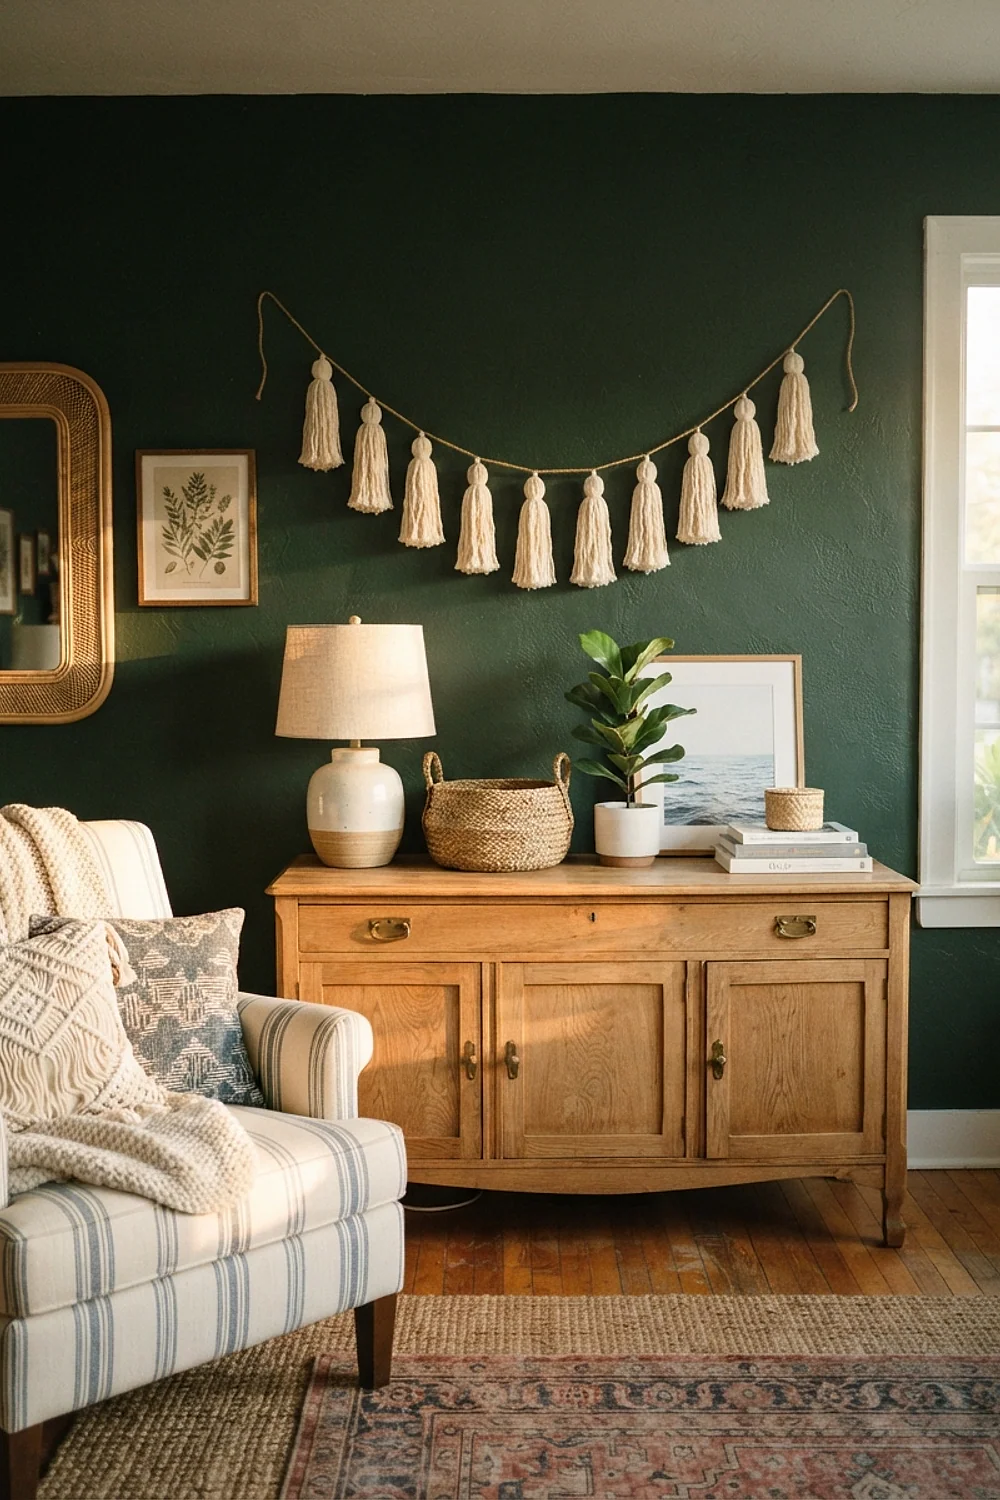
A 3-yard garland costs about $9 in yarn. Wrap it 30 times around a 4-inch piece of cardboard, tie the top, and cut the bottom loops.
Beginner level, one hour, and scissors are the only tool. Draped across a bookshelf or a curtain rod, it softens hard lines.
Hang it with about 25 percent slack so it swags. A garland pulled taut looks like a clothesline.
A vintage suitcase turned side table
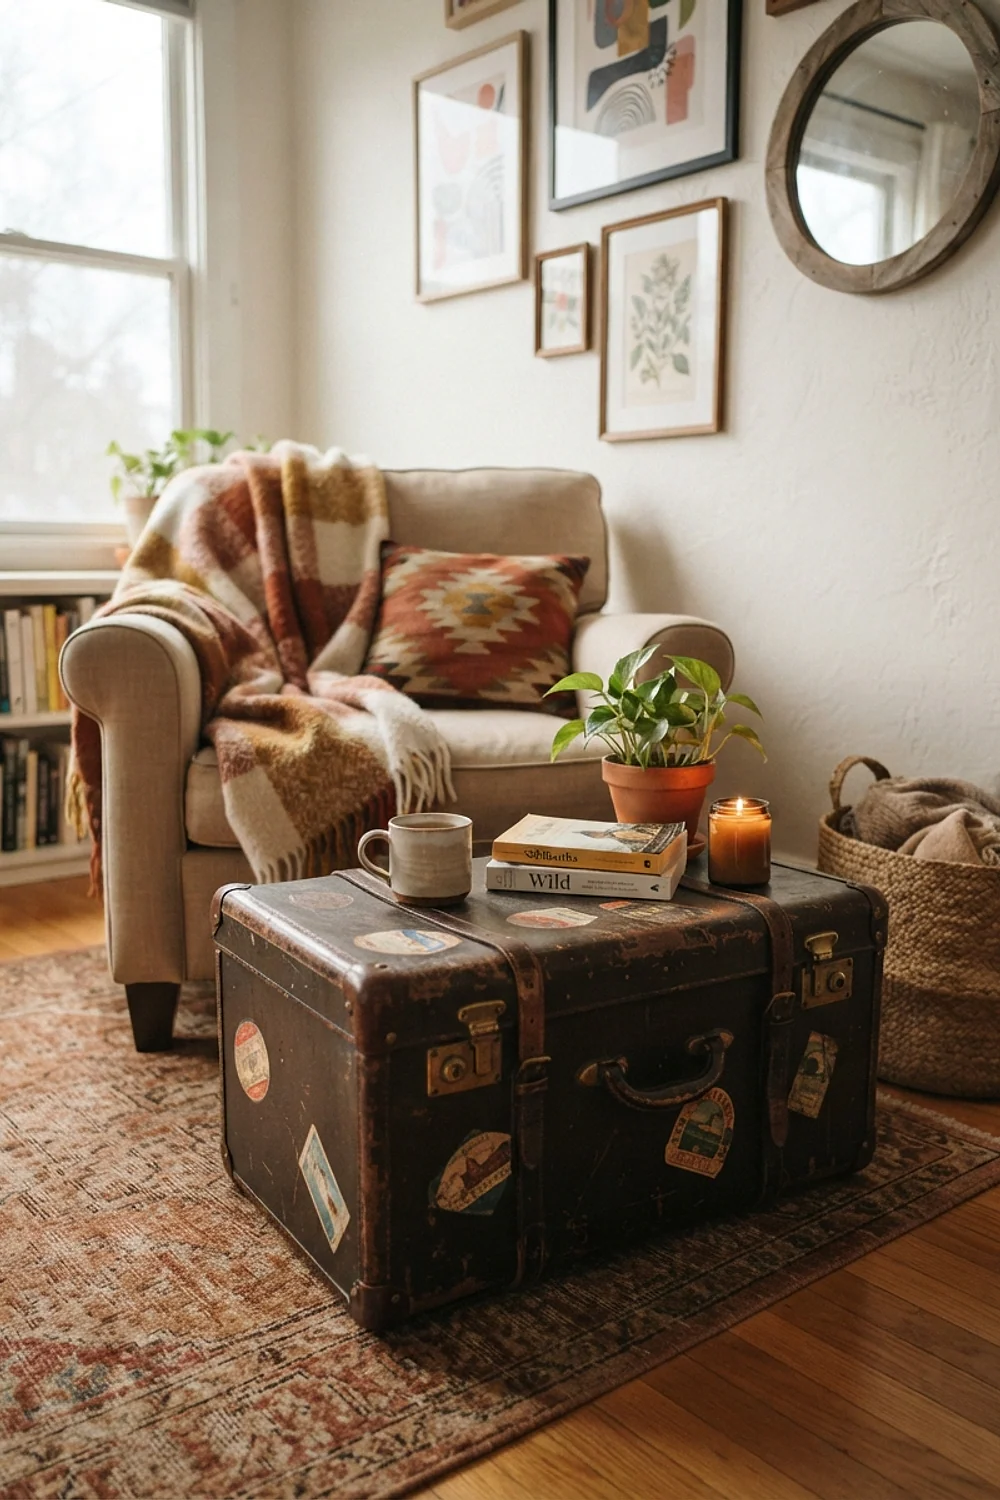
A hard-sided suitcase on four hairpin legs lands at a comfortable 22-24 inches tall, right at armrest height. It also swallows a throw blanket or a few board games inside.
Intermediate level, about 90 minutes. You need a drill, a tape measure, and screws long enough to bite through the plywood plate.
Screw the legs into a 1/2-inch plywood plate glued inside the base. The thin shell alone can’t hold the screws.
A string light canopy over a reading corner
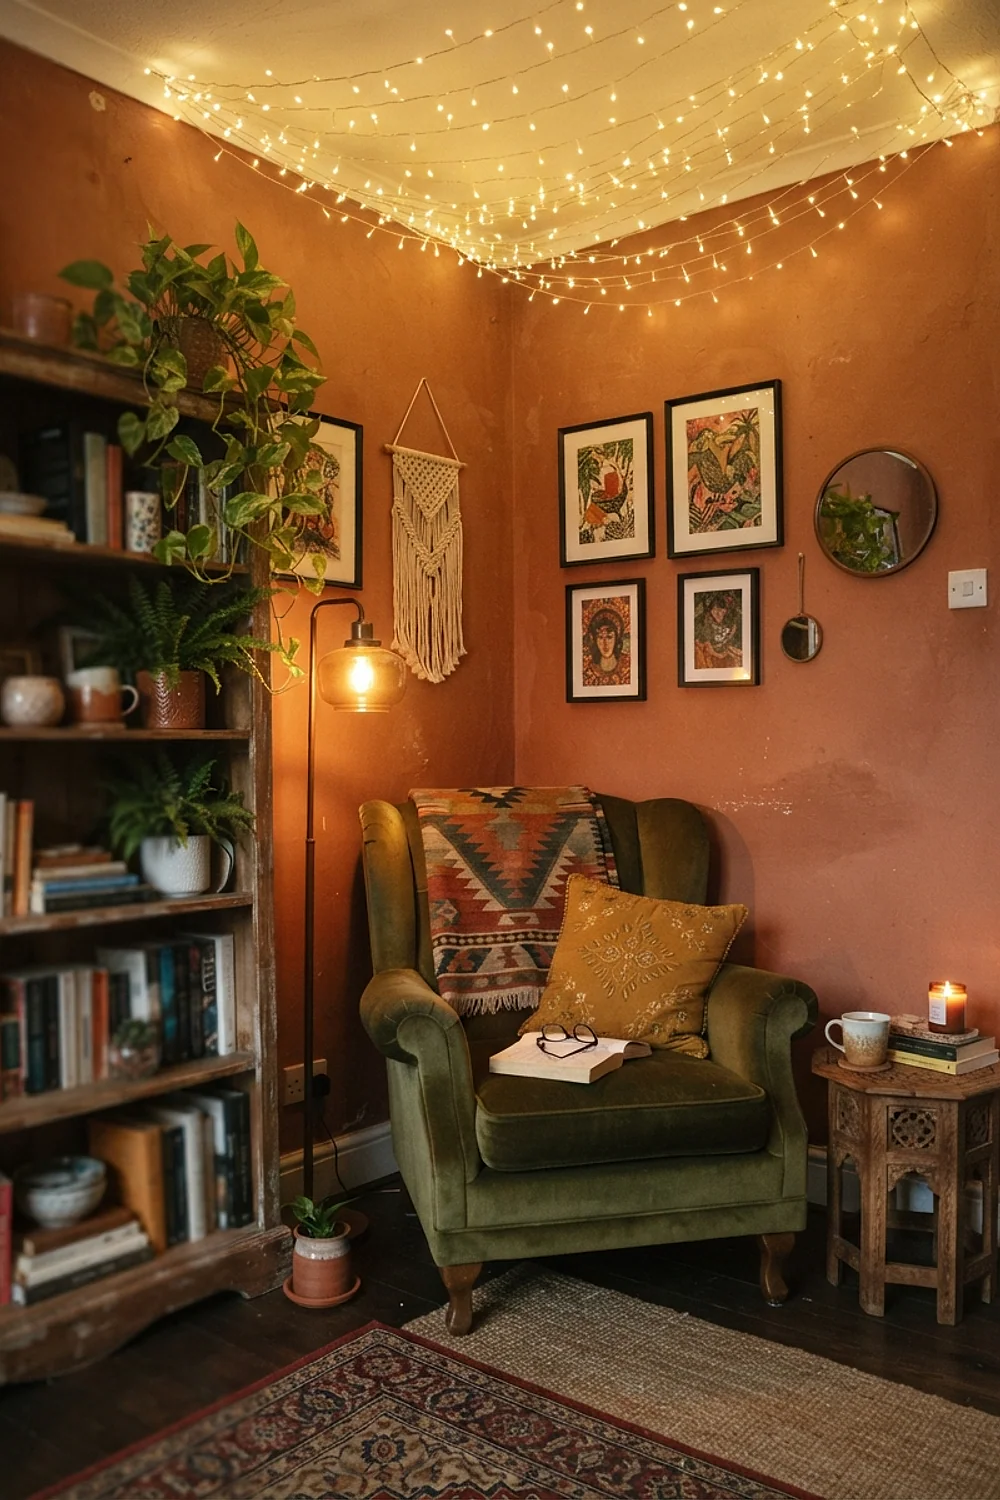
A 33-foot string of warm 2200K LEDs, zigzagged across the ceiling above a chair, glows low and soft after sunset. That calm comes from light sitting below the usual lamp height.
Beginner level, 40 minutes. Adhesive hooks and a step stool handle it, and a plug-in timer saves the daily switching.
Keep bulbs from dangling into the reading line of sight. A strand hanging at eye level becomes a glare instead of a glow.
A wooden bead door curtain
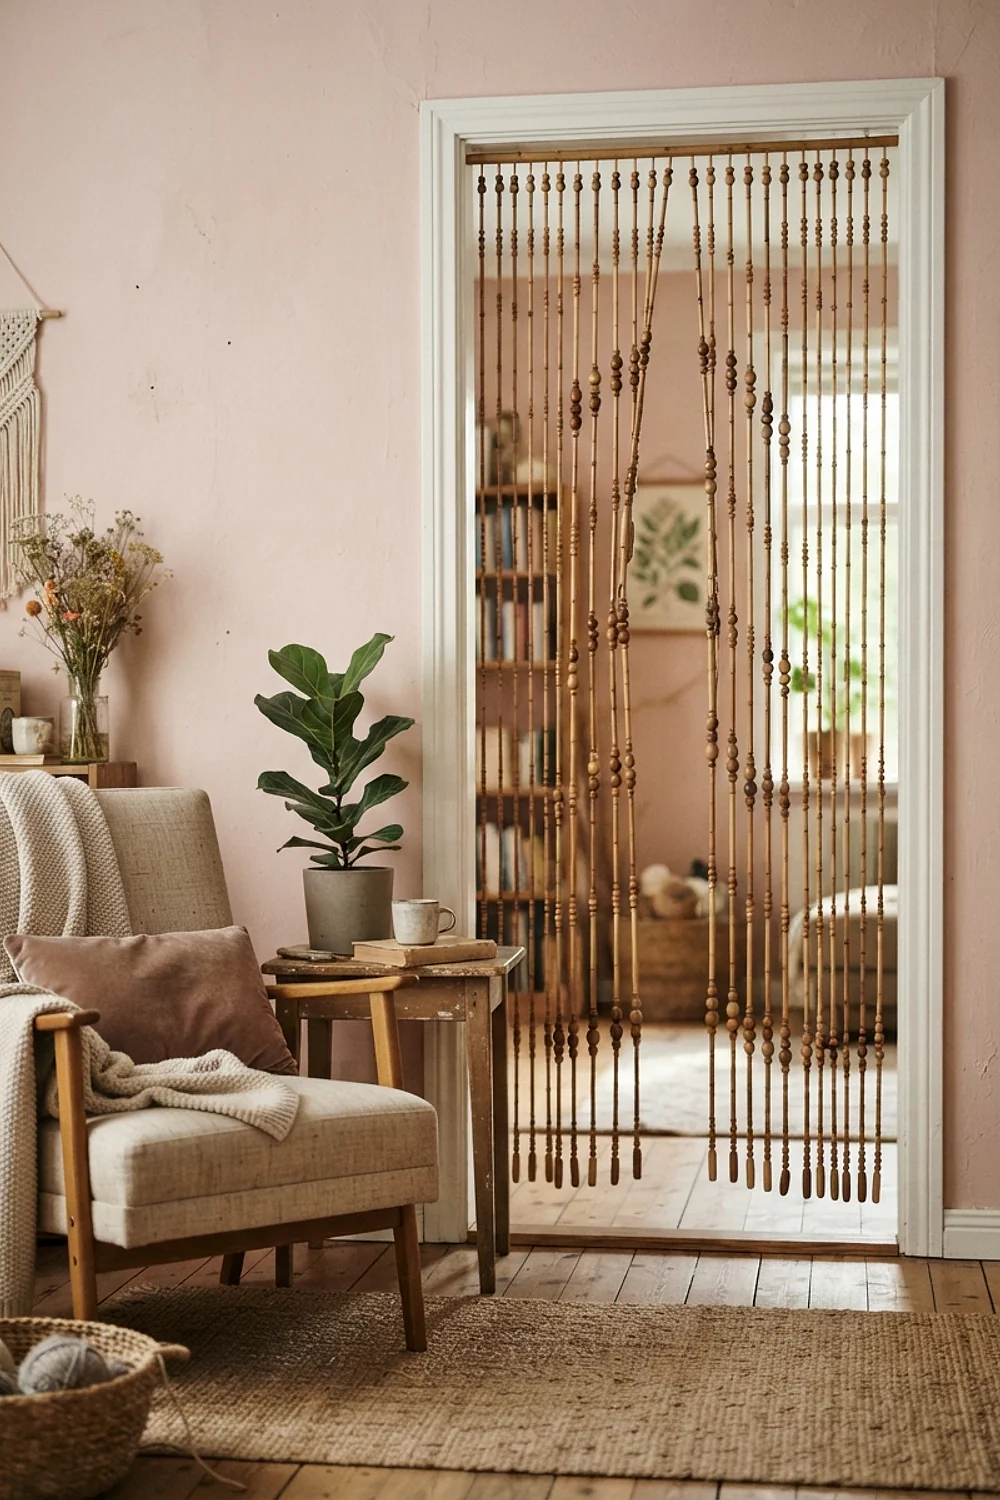
Roughly 700 beads of 30mm wood, strung on jute cord, make a 36-inch curtain that separates a nook without blocking light. The clicking sound as it swings is like a soft rain stick.
Intermediate level, about three hours, because the stringing is repetitive. Scissors, a tape measure, and a tension rod finish it.
Knot under every fifth bead, not just at the bottom. Otherwise one snag sends the whole strand sliding.
A floor vase from a cardboard tube
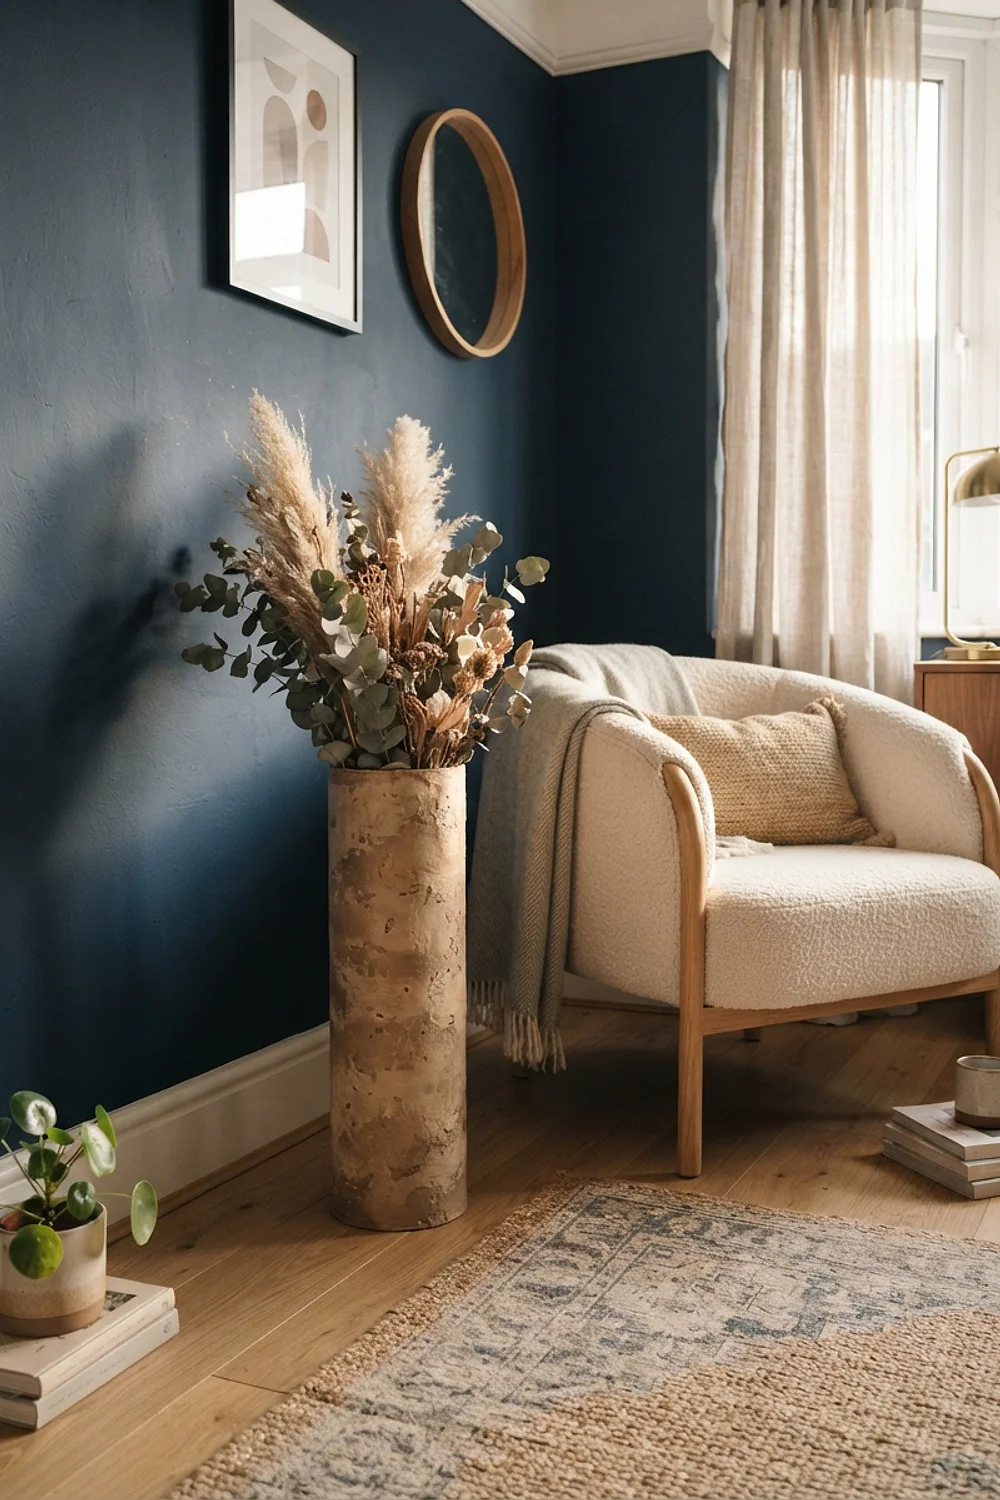
A 36-inch concrete-form tube costs about $14 and, wrapped in jute, becomes an oversized vase for dried pampas. It fills that awkward corner under a low ceiling where a regular plant stand disappears.
Beginner level, about an hour. You need hot glue, scissors, and a few pounds of sand or gravel poured into the base.
Without that weight, the first pampas stem tips the whole thing. About 3 pounds in the bottom 4 inches keeps it upright.
A floating ledge shelf from a pine board
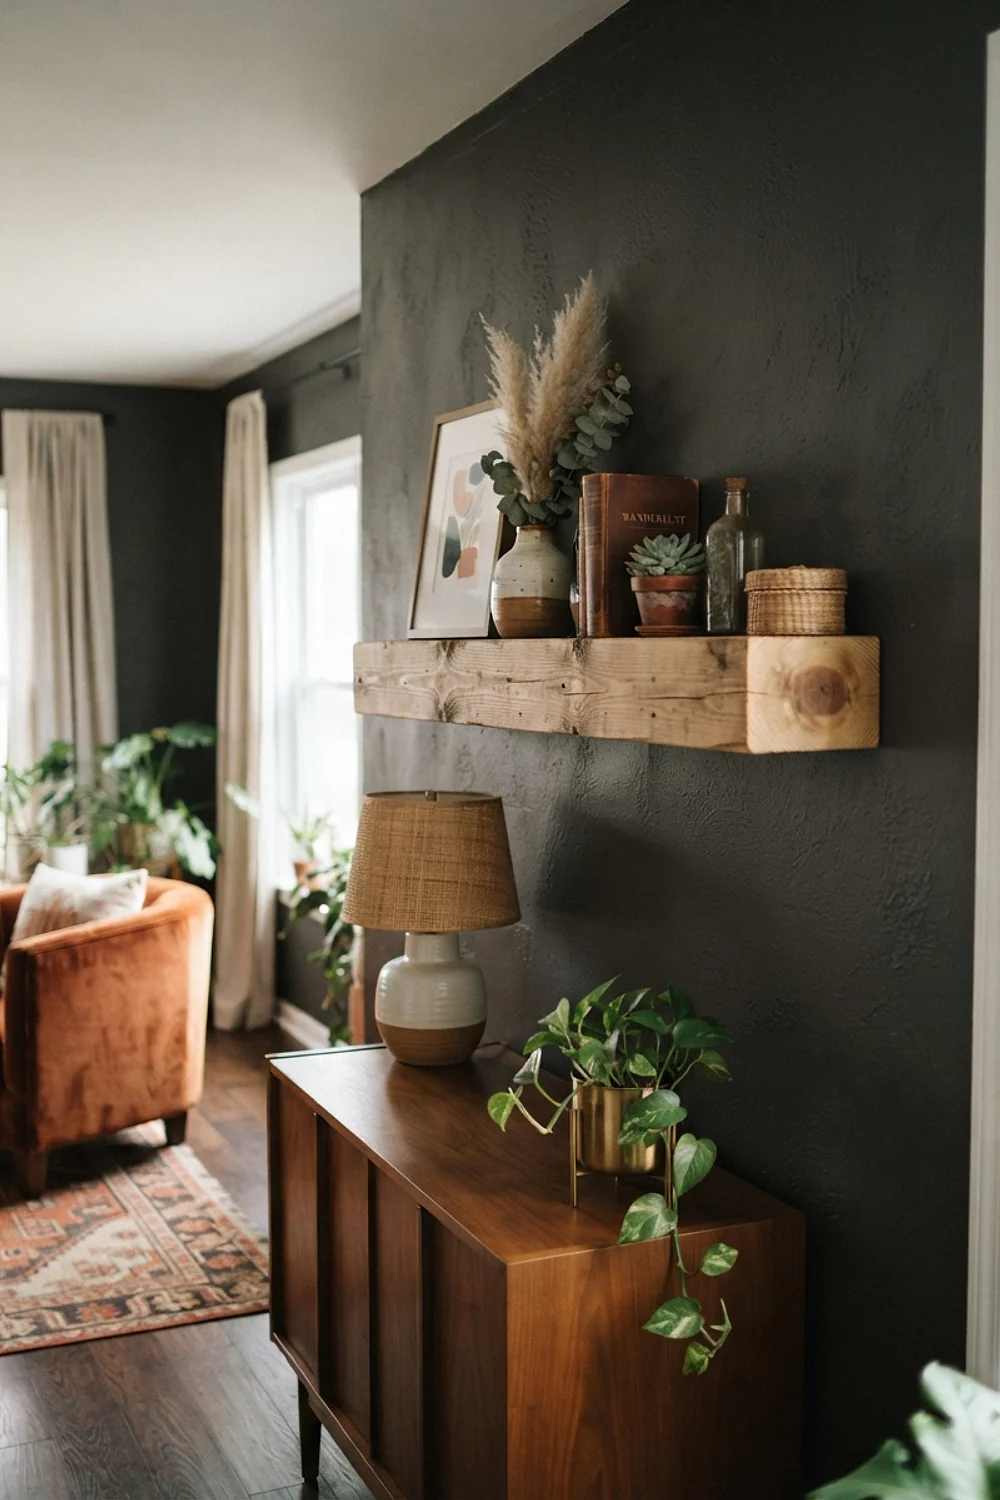
A 1×6 pine board, 36 inches long, on two L-brackets gives you a ledge for leaning frames and a few plants. Sand the edges and wipe on a coat of oil in an afternoon.
Intermediate level, about 90 minutes. Use a drill, a level, and a stud finder to locate studs, typically 16 inches apart.
Plain drywall anchors fail under books. Hit at least one stud, or the first heavy stack will pull the whole shelf off the wall.
Block-printed linen curtains
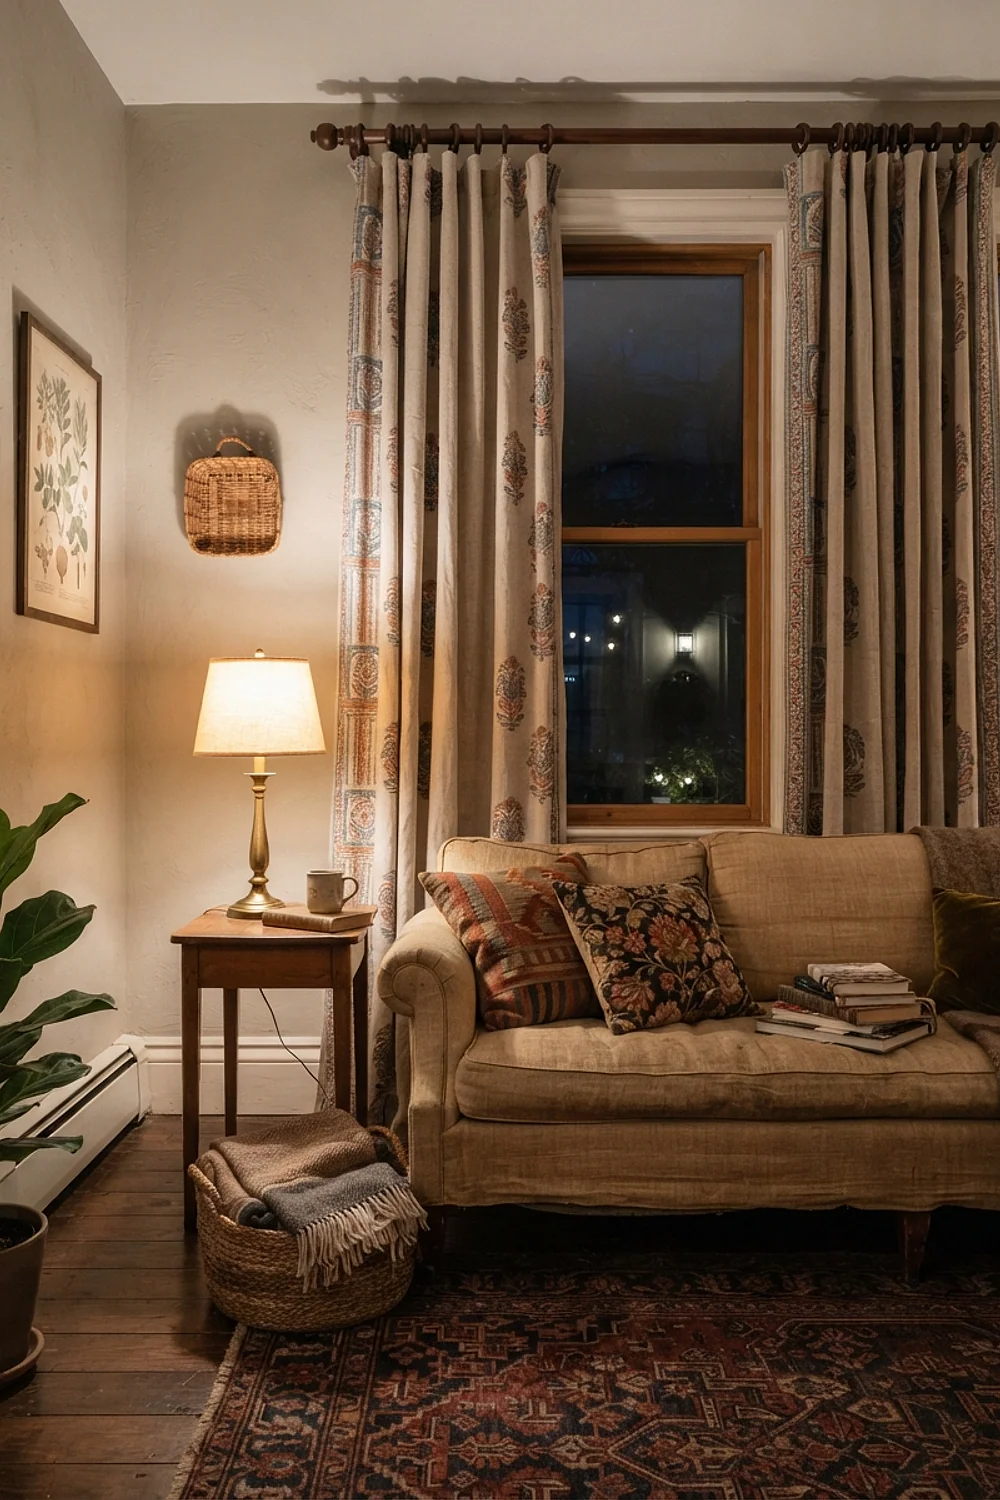
Linen panels printed with a carved foam stamp soften echo in a room full of hard surfaces. The fabric feels dry and slightly nubby, and it filters afternoon sun into a gentle haze.
Intermediate level, about four hours. A craft knife, a brayer, and fabric paint do the job.
Wash the linen before printing. Factory sizing blocks the paint, and the print fades in the first wash.
A fabric-lined seagrass basket for throws
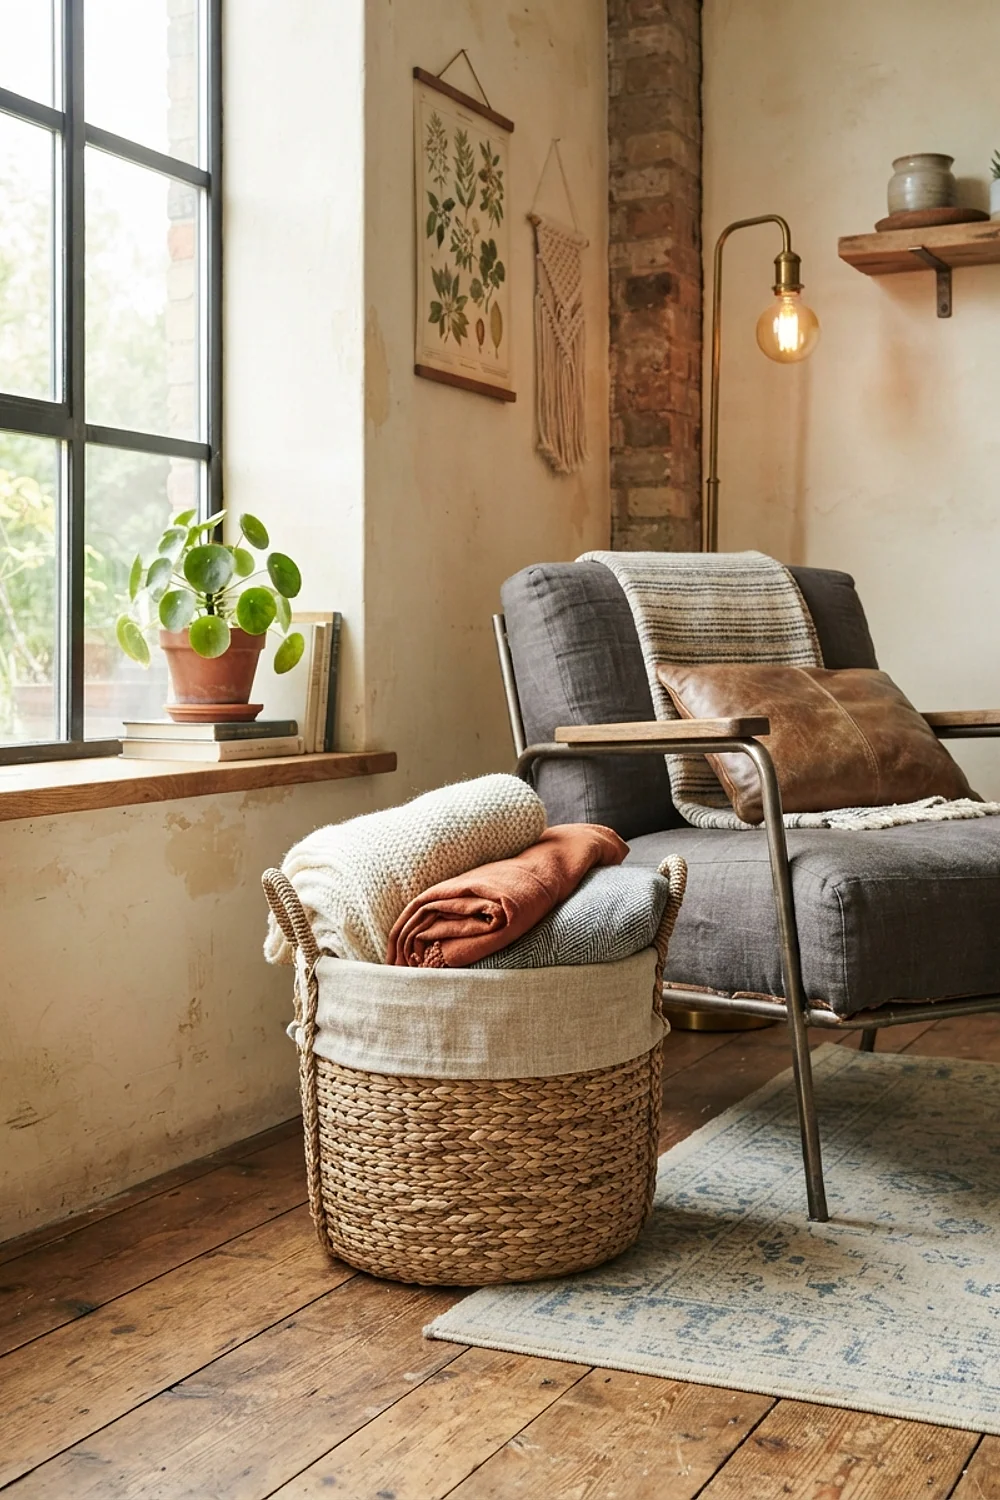
Knit throws stay off the floor when they go into a lidded seagrass basket, 18 inches across and lined with cotton. It also hides the clutter a small living room has no console to store.
Beginner level, about 45 minutes. Hot glue and scissors are enough to fit the liner inside.
Skip the lining and loose seagrass ends snag chunky knits. Cut the fabric 1 inch taller than the basket and fold the extra over the rim.
A rope-wrapped round mirror
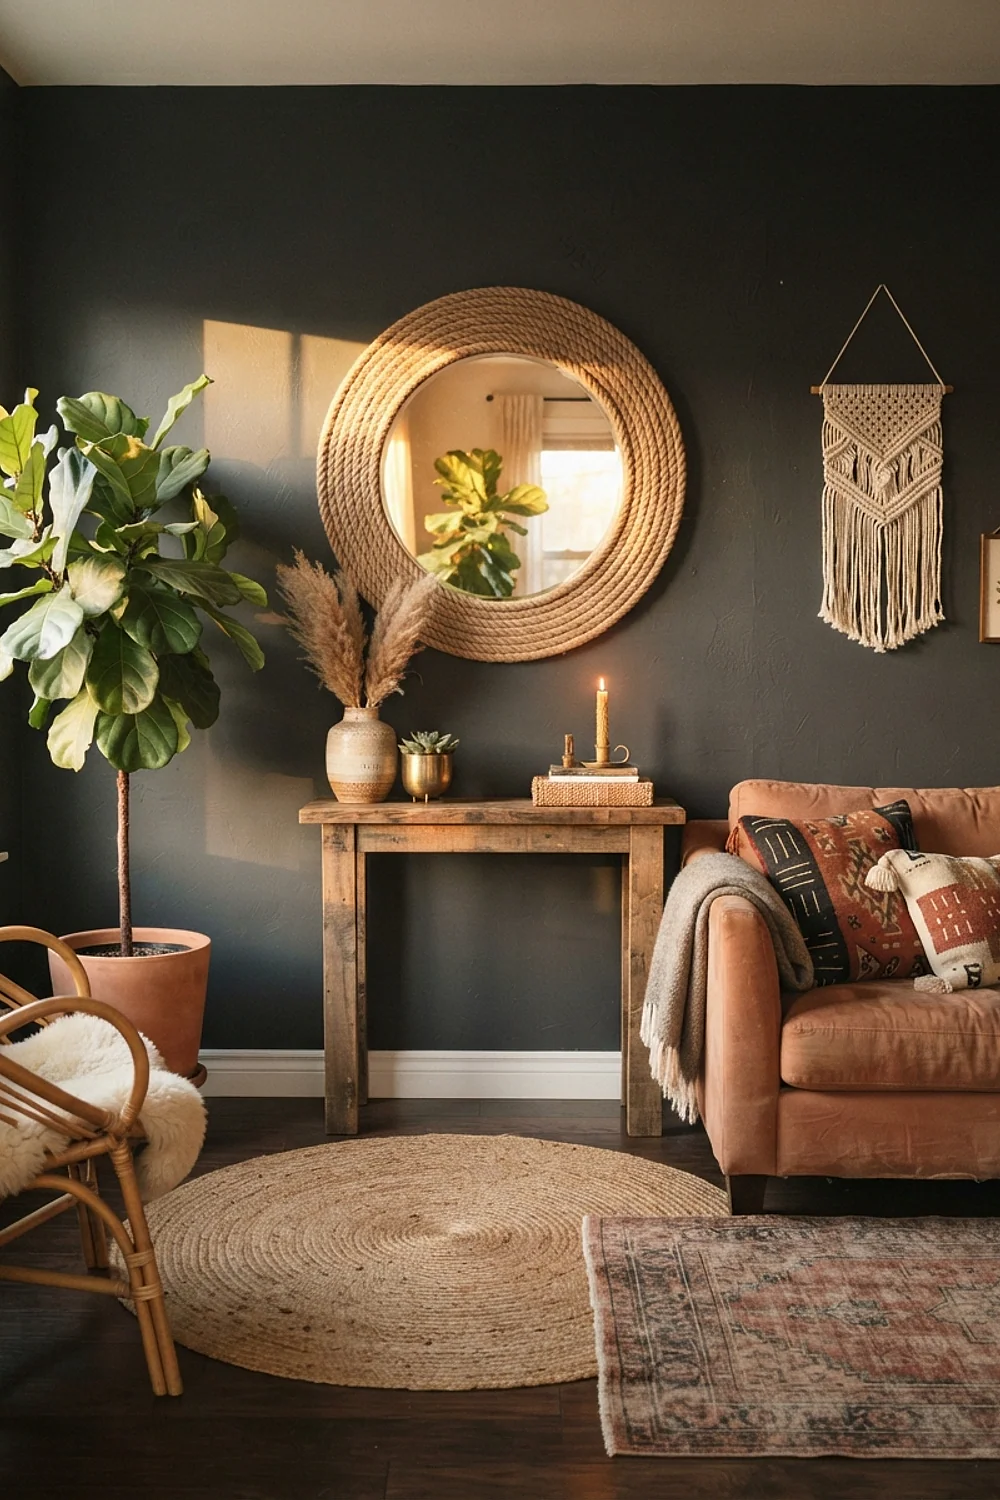
A 24-inch round mirror wrapped in 1/4-inch sisal rope sits best on the wall opposite a window. It bounces daylight deeper into the room, which matters most in north-facing living rooms.
Beginner level, about an hour. A hot glue gun and scissors cover it, and a picture-hanging wire sits at the back.
Hang it so its center lands near 57 inches. Mirrors hung too high mostly reflect the ceiling.
A tea- and indigo-dyed cotton throw
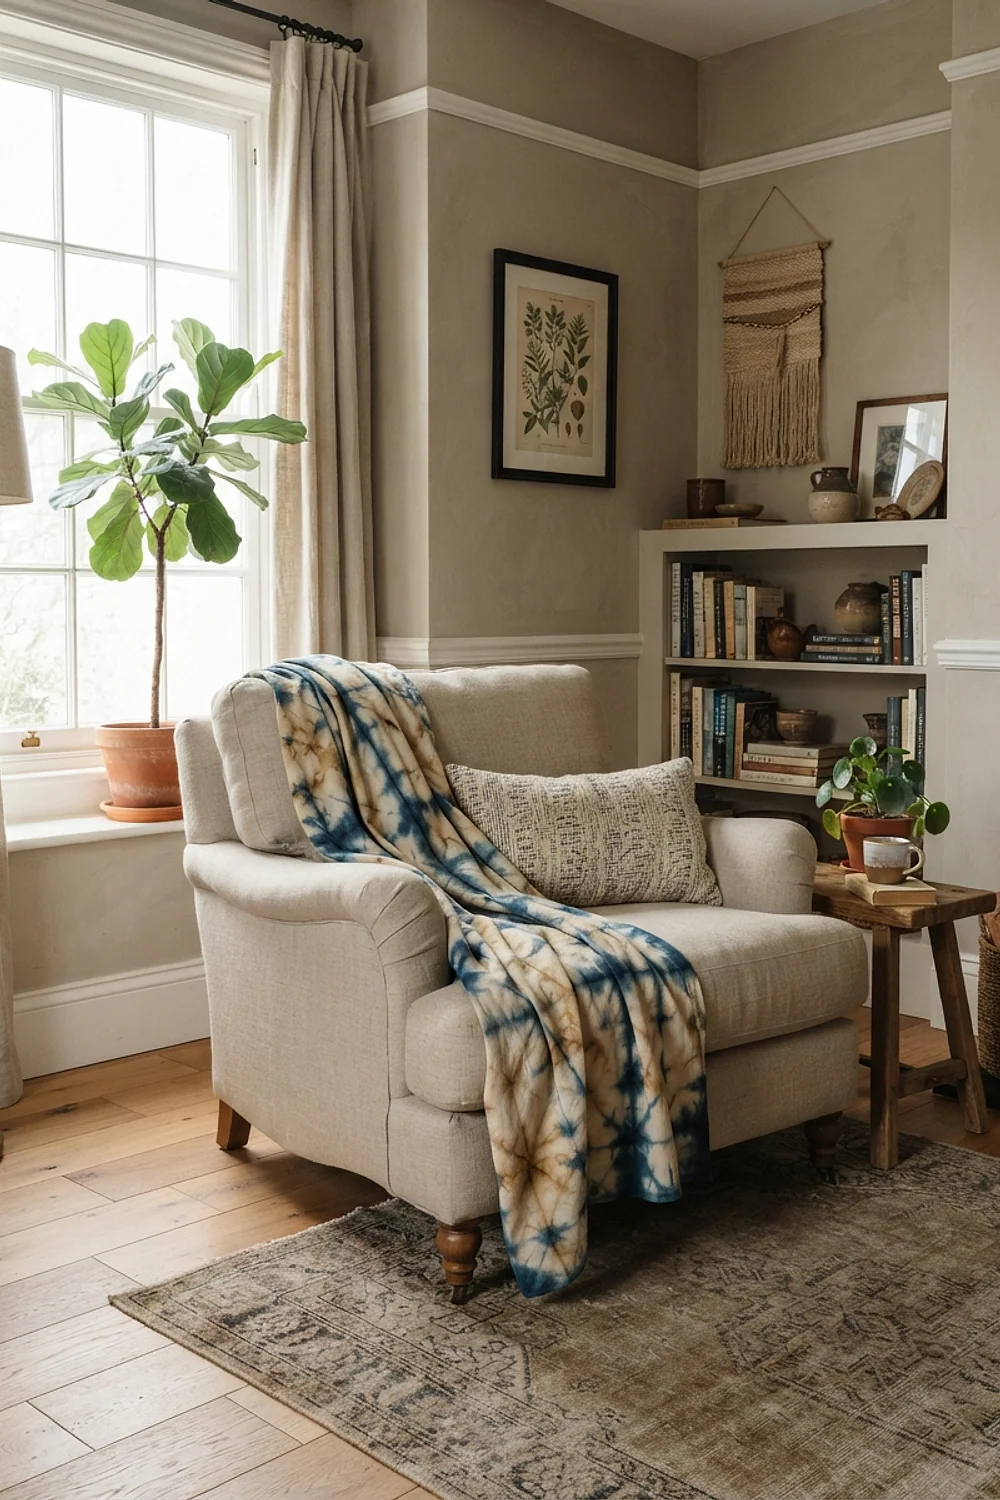
A cotton throw steeped in black tea turns a warm tan, while a $22 indigo kit gives a range of blues. Together they tie into a rust-and-cream palette without matching anything exactly.
Intermediate level, about three hours plus drying. A large bucket, rubber gloves, and hot tap water cover the setup.
Keep the fabric moving, since a crumpled throw dyes in patches. Wash it cold and separately for the first few cycles.
A tiered plant stand from three stools
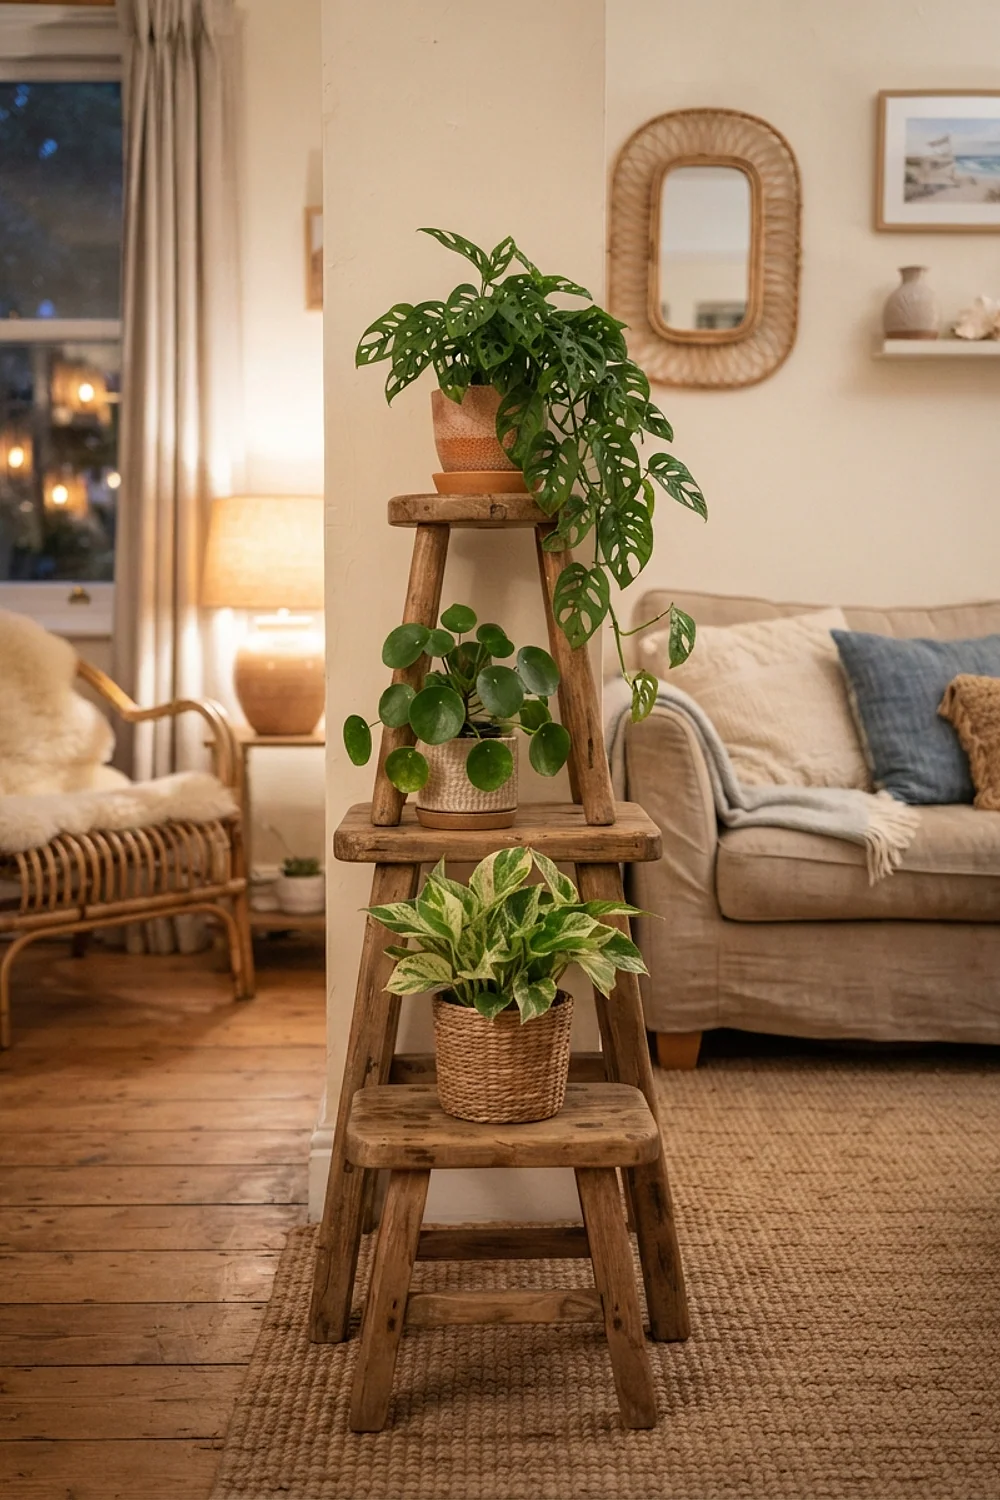
Three thrifted stools at roughly 12, 18, and 24 inches, grouped together, give a plant display natural height variation. Odd numbers and staggered heights read as arranged without looking stiff.
Beginner level, 20 minutes, and sandpaper is the only tool. Each stool just needs a light sanding.
Use saucers under every pot. One overwatered fern can leave a ring on a wood floor that never fully fades.
A folding tray table from a thrifted tray
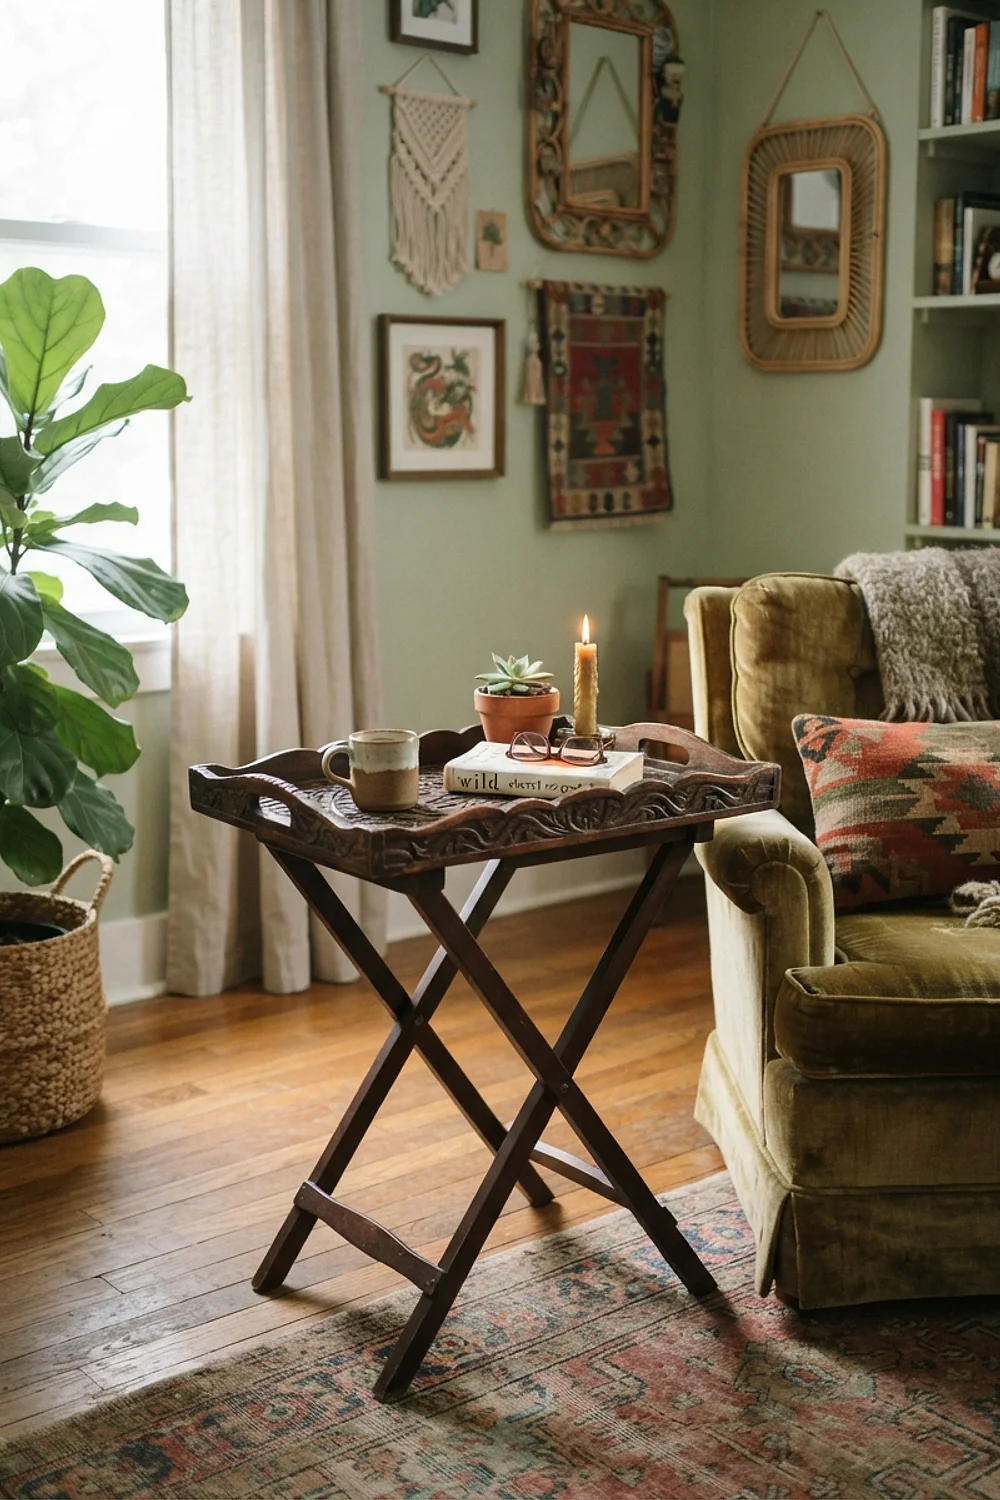
Drinks and a book get a landing spot when a wooden tray, 20 by 14 inches, sits on a folding stand as a one-person table. It folds flat behind the sofa, which suits small apartments.
Beginner level, about 15 minutes. A screwdriver attaches the stand to the underside.
Check the tray’s lip height. Under 1 inch and glasses slide off, so line the surface with shelf liner or a cork pad.
A lampshade recovered in printed cotton
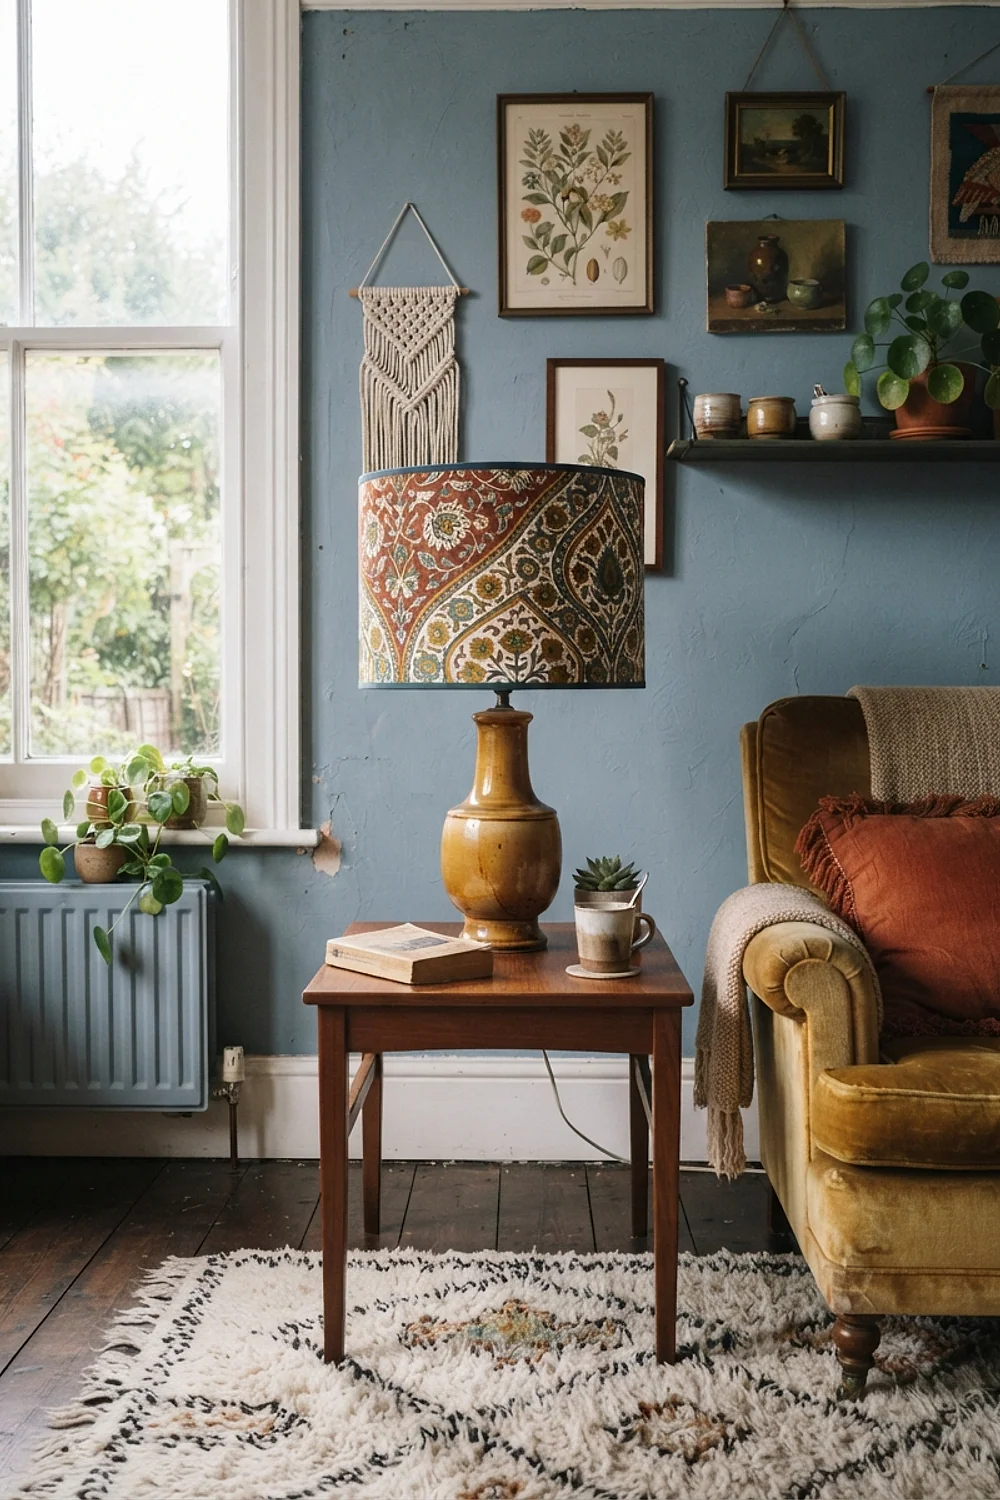
A 14-inch drum shade wrapped in light block-print cotton glows with a soft pattern at dusk. It’s a quick way to refresh a thrifted lamp base that has good bones.
Intermediate level, about an hour. Spray adhesive, scissors, and a straight edge keep the seam clean.
Medium-weight cotton in a light color transmits glow; dark or heavy fabric blocks it. Stick to LED bulbs, since halogen heat can scorch the fabric.
An air-dry clay terrazzo tray
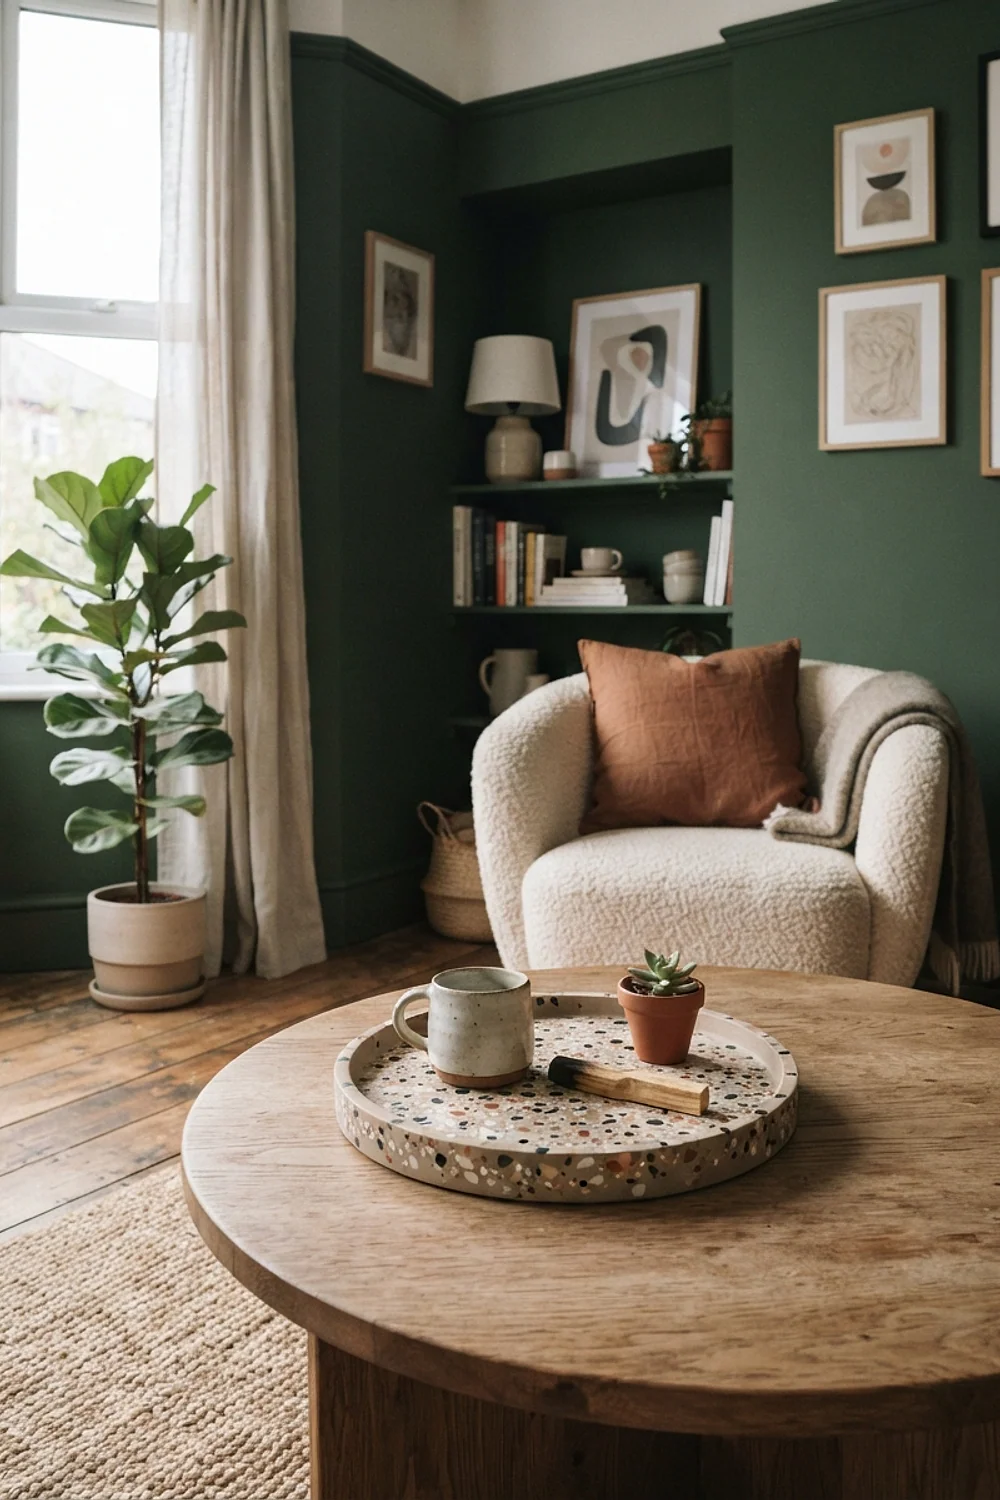
A 2-pound block of air-dry clay costs about $9. Roll it to 1/4 inch, press in colored chips, and sand the surface smooth for a terrazzo-style catchall.
Beginner to intermediate, about two hours plus 48 hours of drying. A rolling pin, fine sandpaper, and a matte sealer are the only tools.
Uneven edges crack as the clay dries. Keep the tray for keys and rings, never water or plants.
A leaning ladder blanket rack
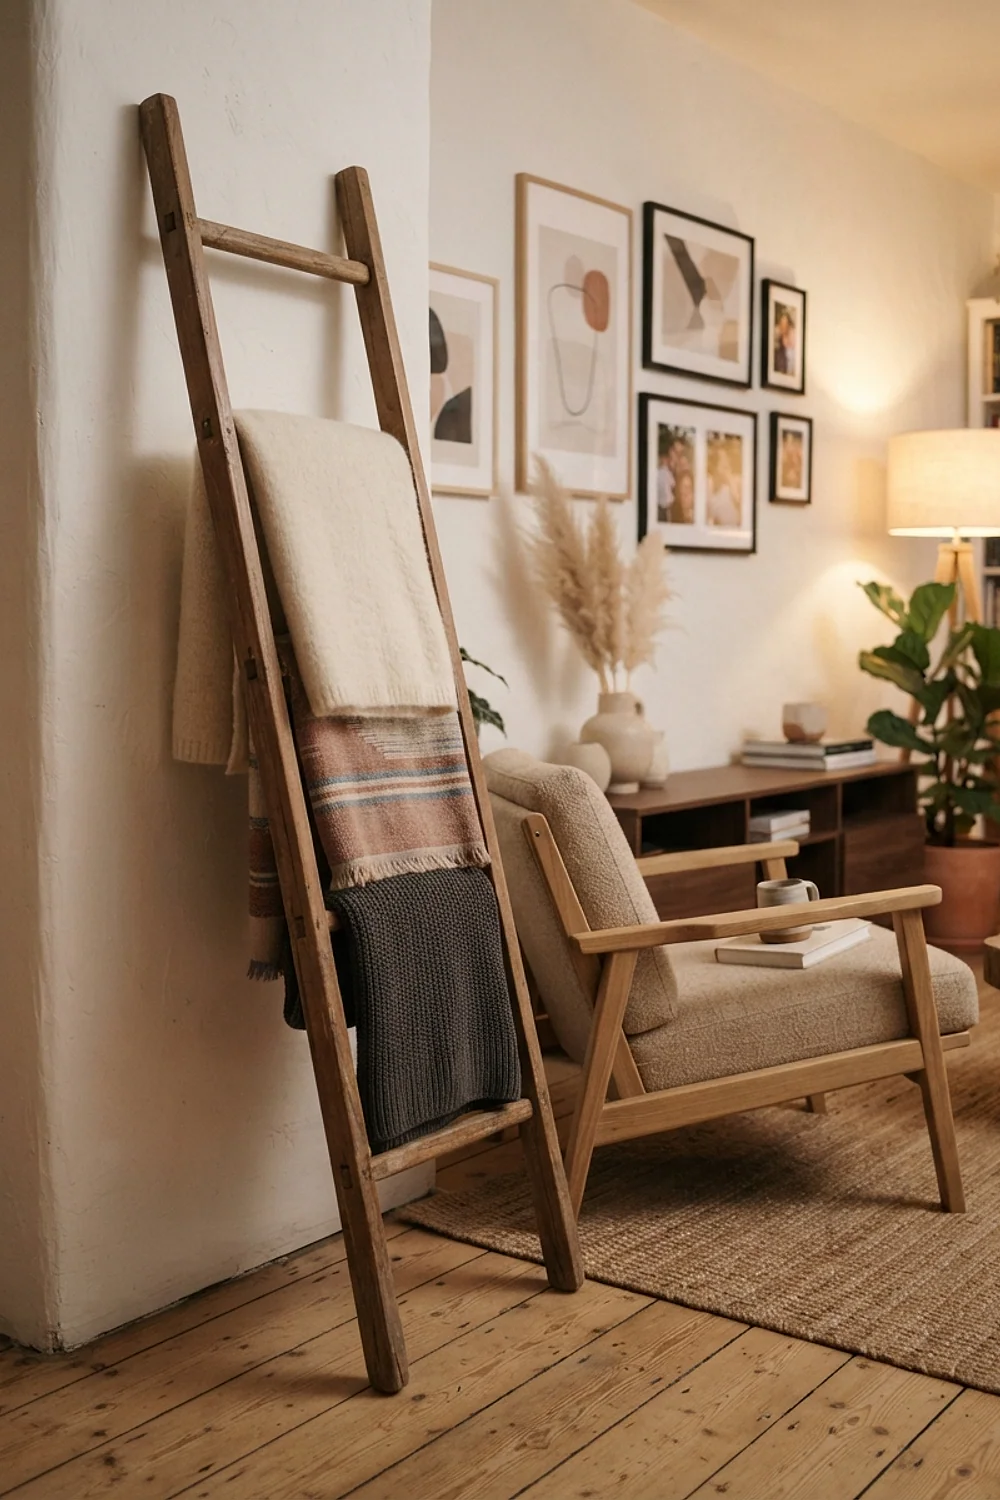
A 6-foot wooden ladder leaned about a foot from the wall gives a low-ceilinged corner some vertical drama. Throws drape over the rungs, which makes them part of the display.
Beginner level, about an hour. Sandpaper and an oil-soaked rag smooth the rungs.
Choose a ladder under 20 inches wide in a tight room. Add non-slip pads to the feet and a wall bracket if kids are around.
A spray-painted rattan chair
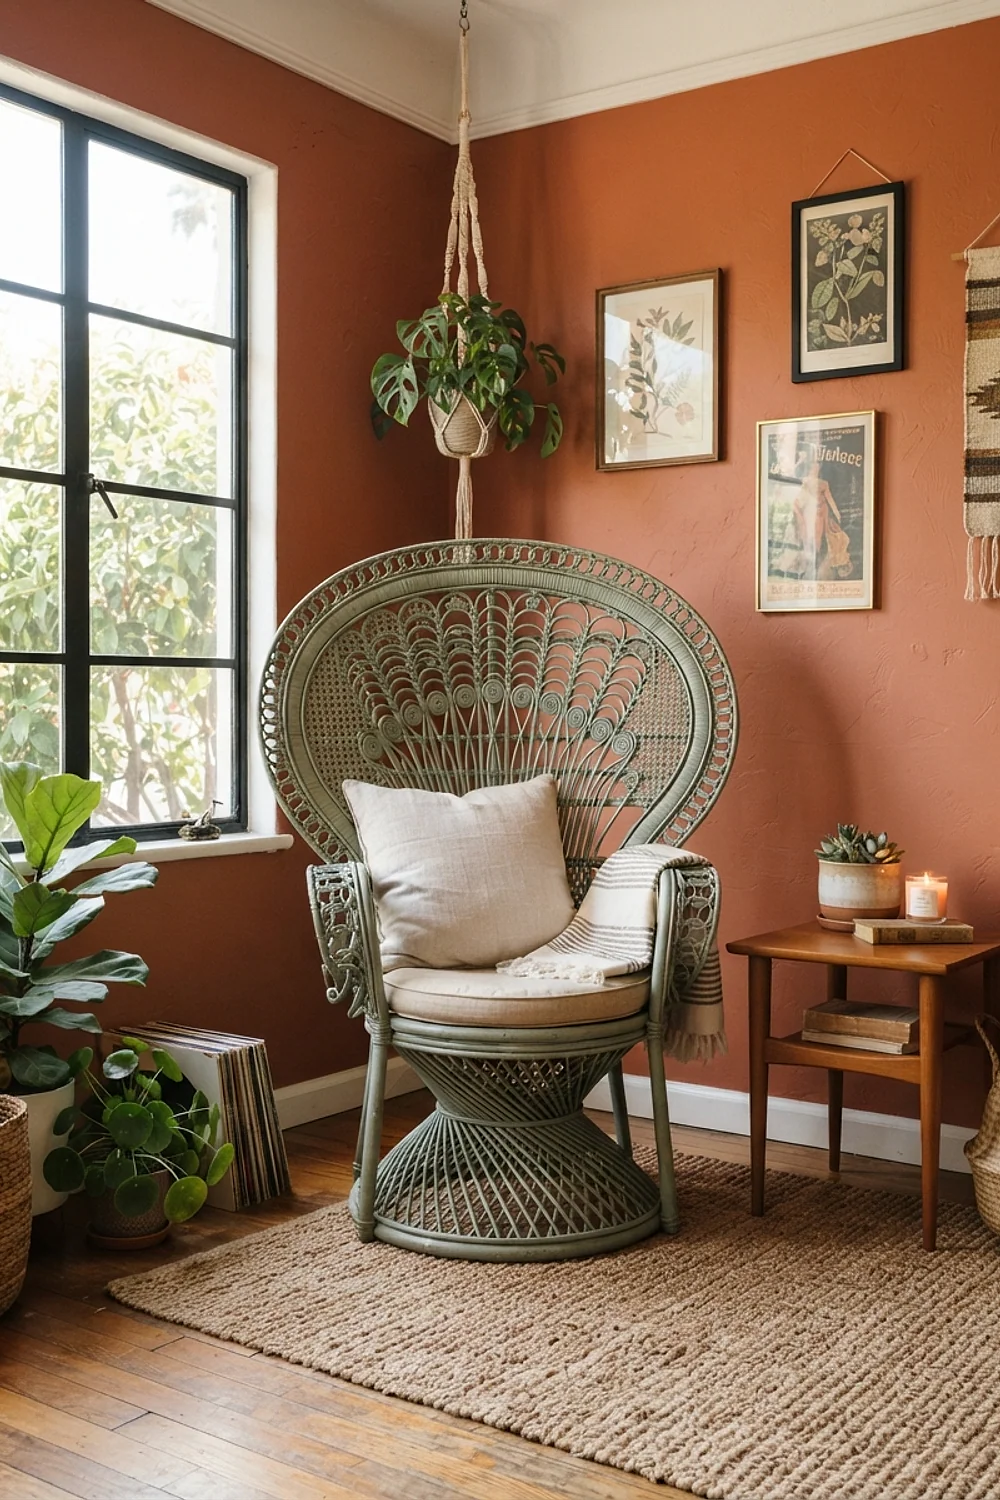
A rattan chair needs primer first, then two light coats of spray paint at 8-12 inches away. A heavy coat drips into the weave and stays tacky for days.
Beginner level, two hours plus a 24-hour cure. Sand with 220-grit paper, wear a respirator, and work outdoors.
On a damp November Sunday, humidity above 65 percent leaves the finish sticky. Wait for a dry day or paint indoors with a fan running.
An arm-knit chunky blanket
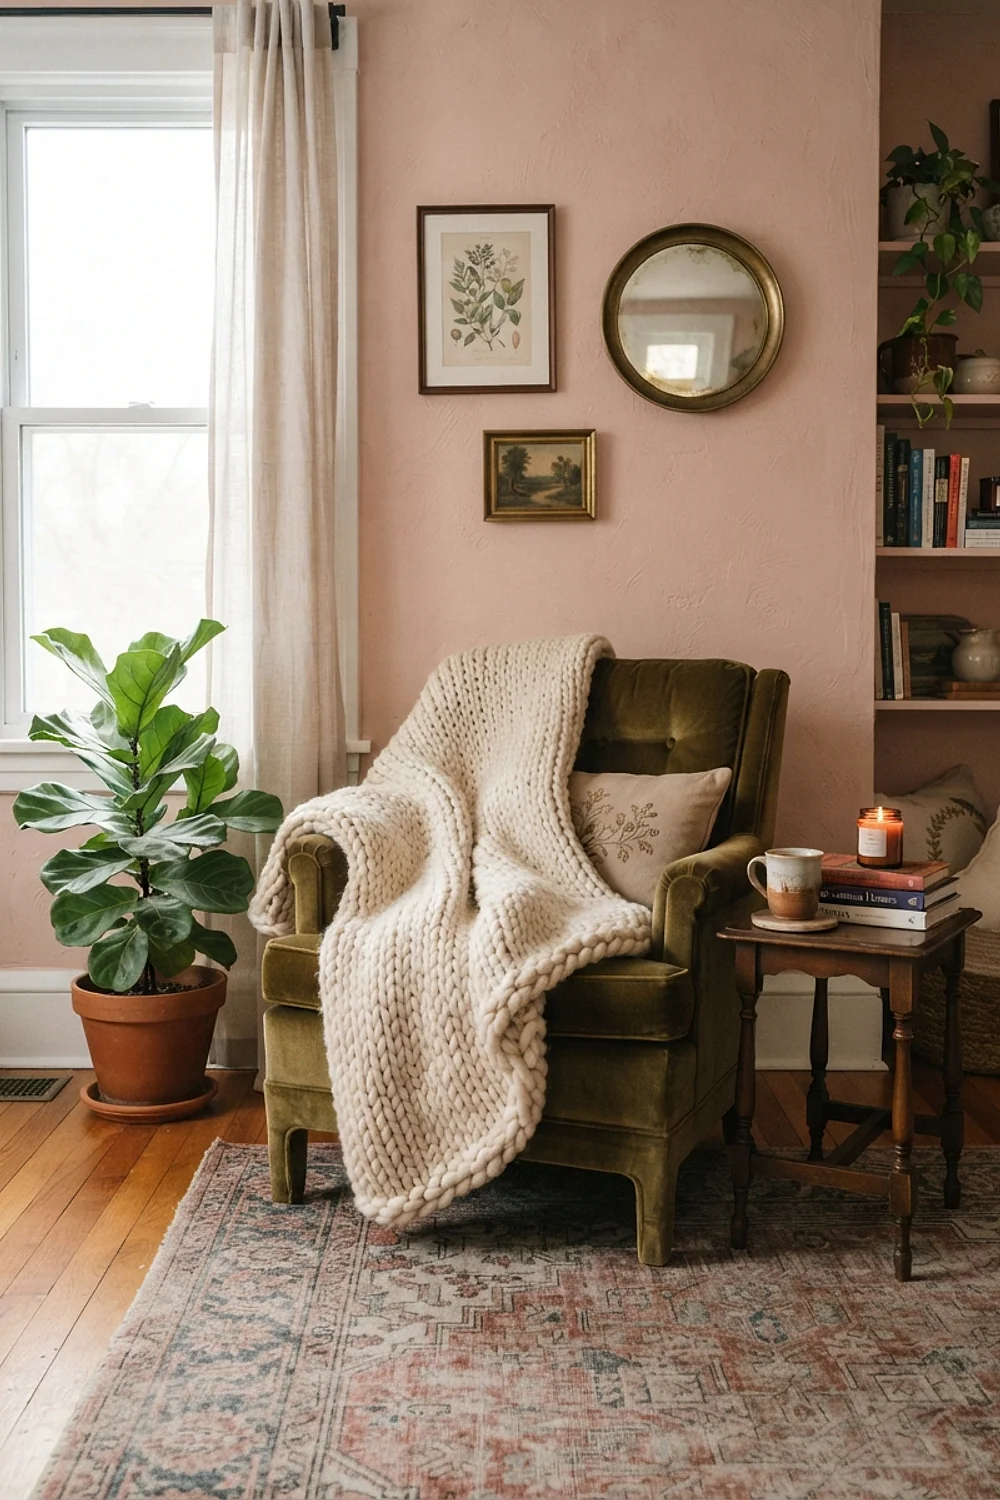
Eight skeins of chenille yarn knit with your arms produce a 40 by 60 inch blanket weighing about 4 pounds. That heft is what makes a sofa corner feel cozy on a cold evening.
Beginner level, about three hours, and no tools at all. Arm-knitting needs only your hands and a clear floor.
Keep the cast-on loose. A tight edge puckers the whole blanket, and chenille sheds a bit in the first wash.
A wooden peg rail for hats and baskets
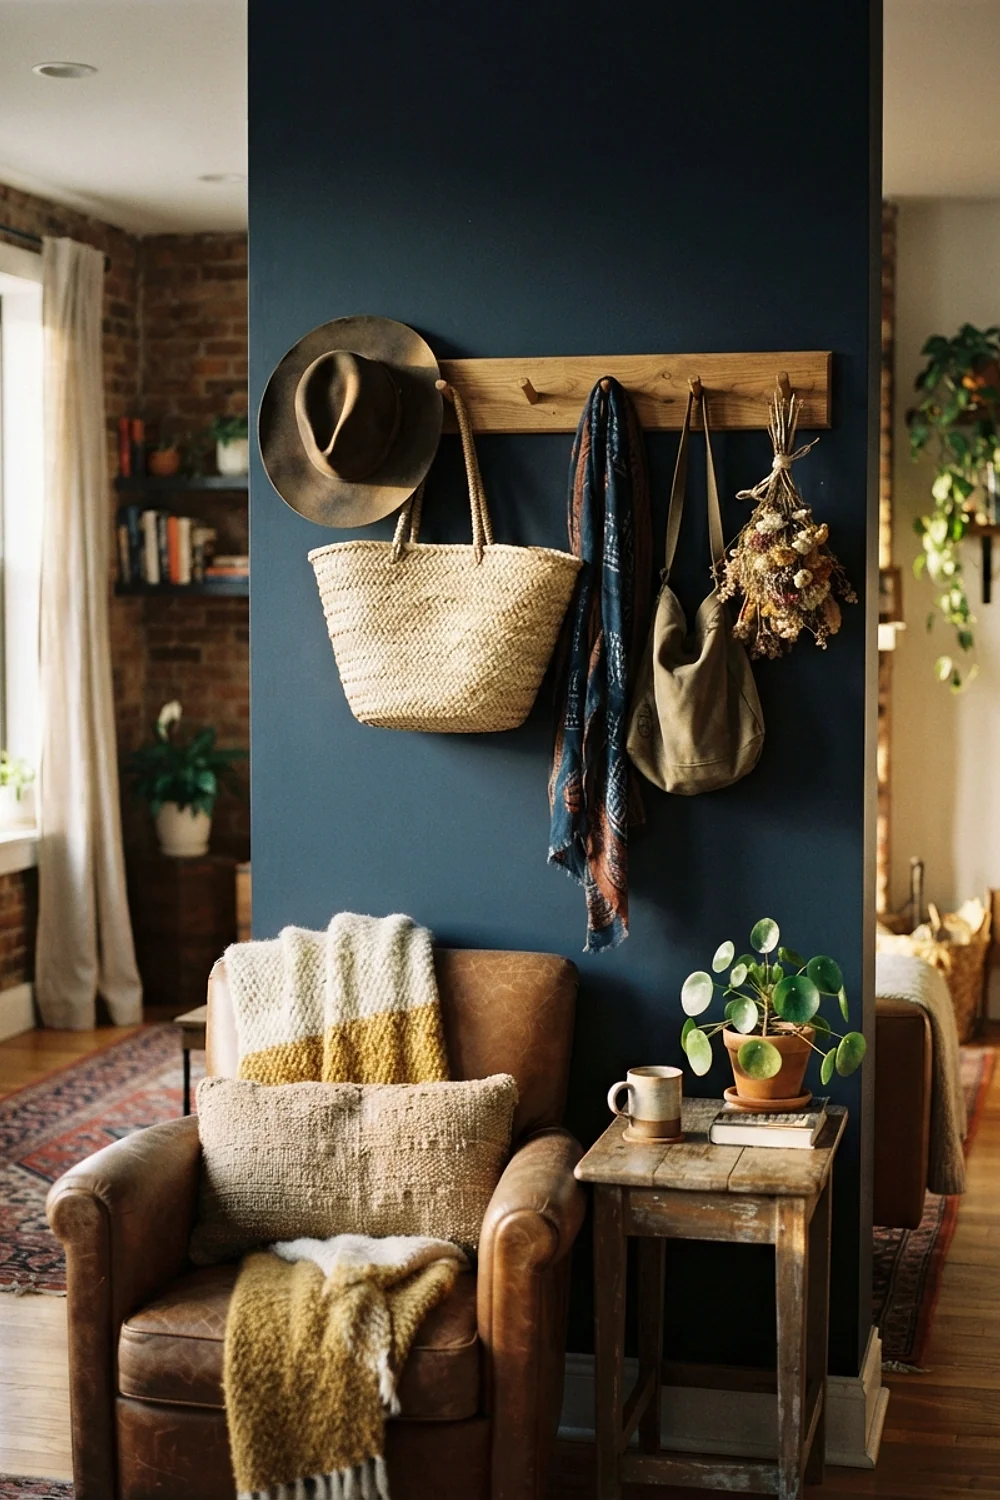
Baskets, hats, and bags come off the floor and onto a 36-inch pine rail with five Shaker pegs that costs under $25. Mount it at 58-60 inches for easy reach near a doorway.
Beginner to intermediate, about an hour. A drill, a level, and a stud finder are the whole kit.
Keep pegs at least 6 inches apart. Bulky items crowd each other, and the rail starts to look cluttered.
A reading nook framed by a curtain rod canopy
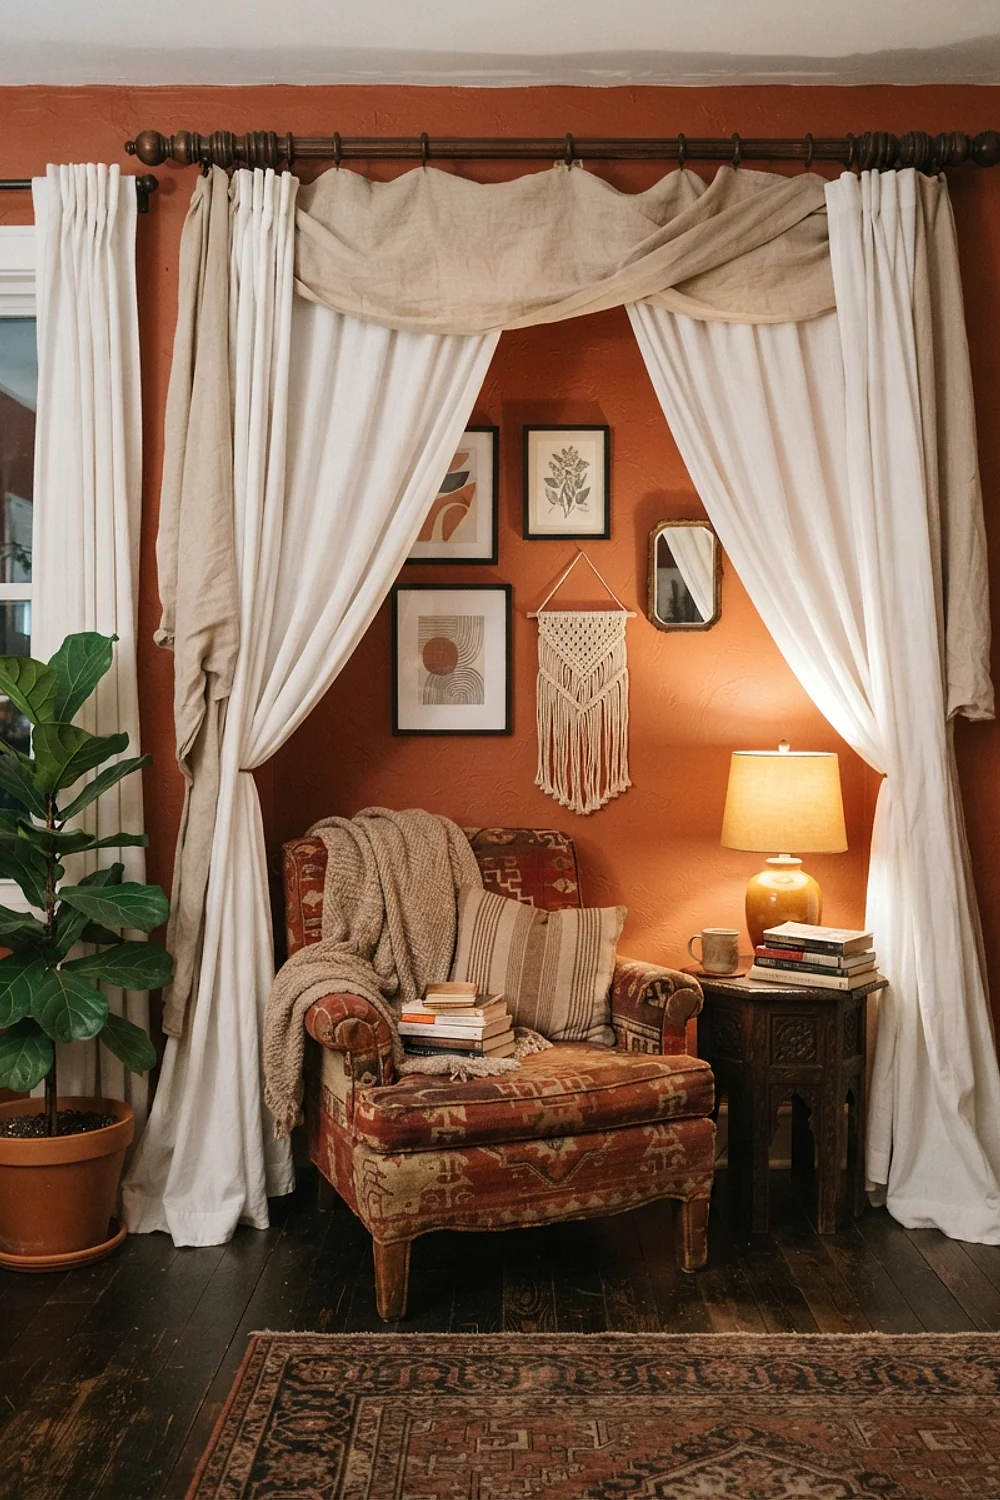
A ceiling-mounted rod with two 84-inch panels carves a 4 by 5 foot nook out of a corner. The curtains soften the walls while the chair inside stays cozy and private.
Intermediate level, about two hours. Use a drill, a level, and a stud finder for anchoring into the ceiling.
Keep a 30-36 inch walkway clear around the nook. Blocking a traffic path or a vent turns a feature into an obstacle.
A color-blocked dresser in rust and cream
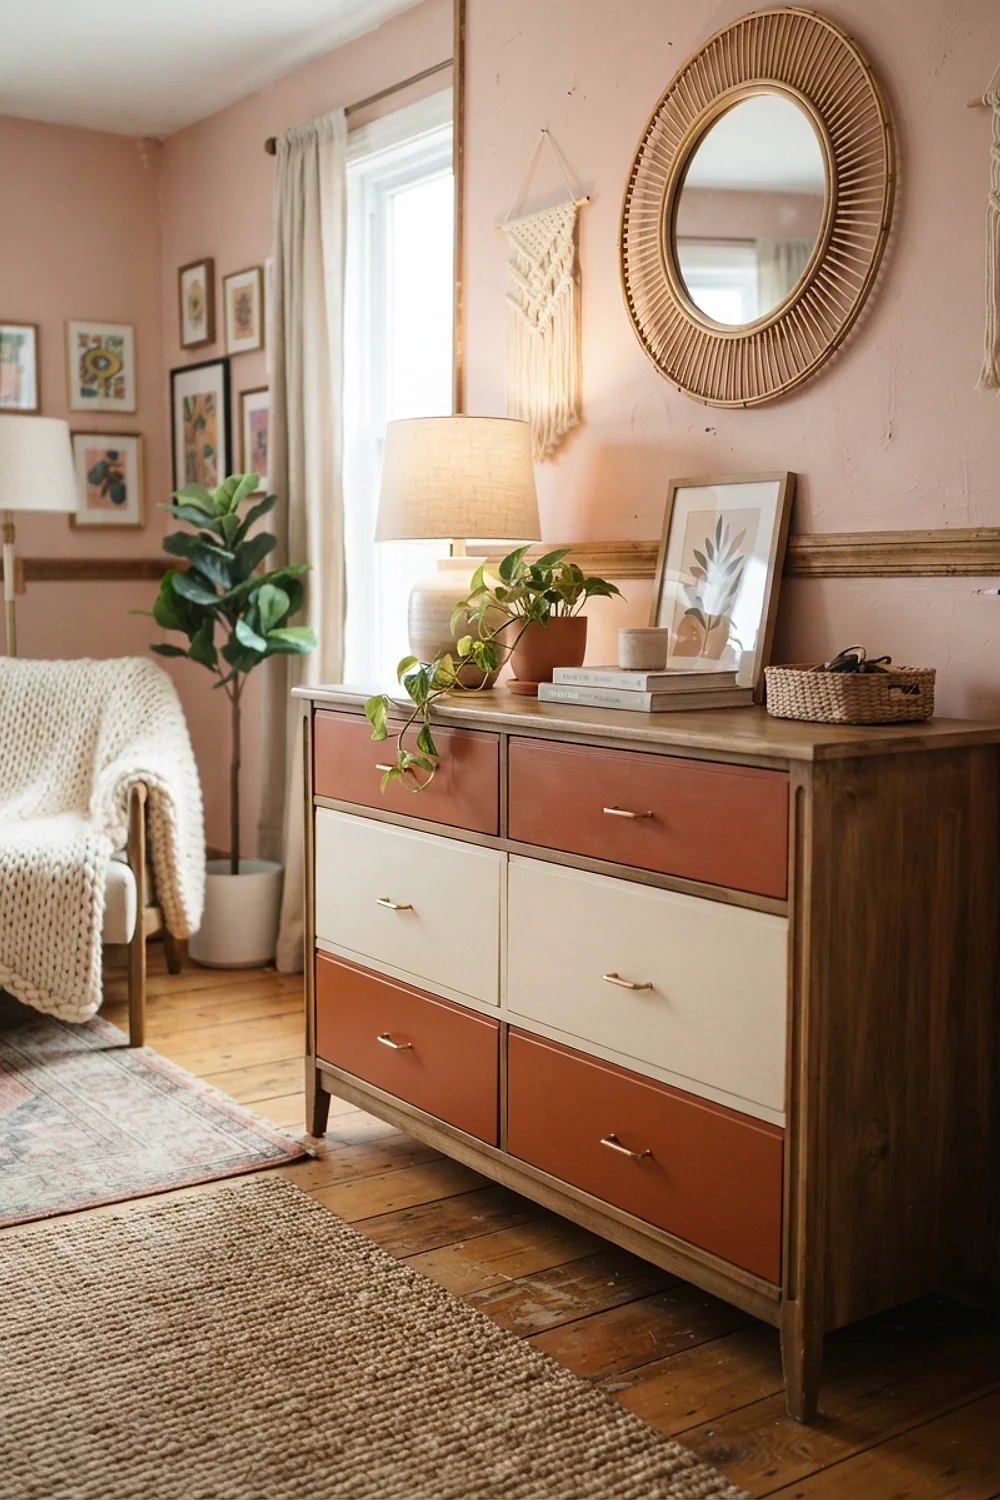
Painting drawer fronts in alternating rust and cream turns a dated dresser into a focal point. Two tones keep it bold without getting loud.
Intermediate level, about four hours plus drying. Sandpaper, a brush, painter’s tape, and chalk paint cover the job.
Sand glossy finishes first or the paint peels in sheets. Seal with wax on top for a soft, slightly chalky feel under your fingers.
Pressed flower art in 8×10 frames
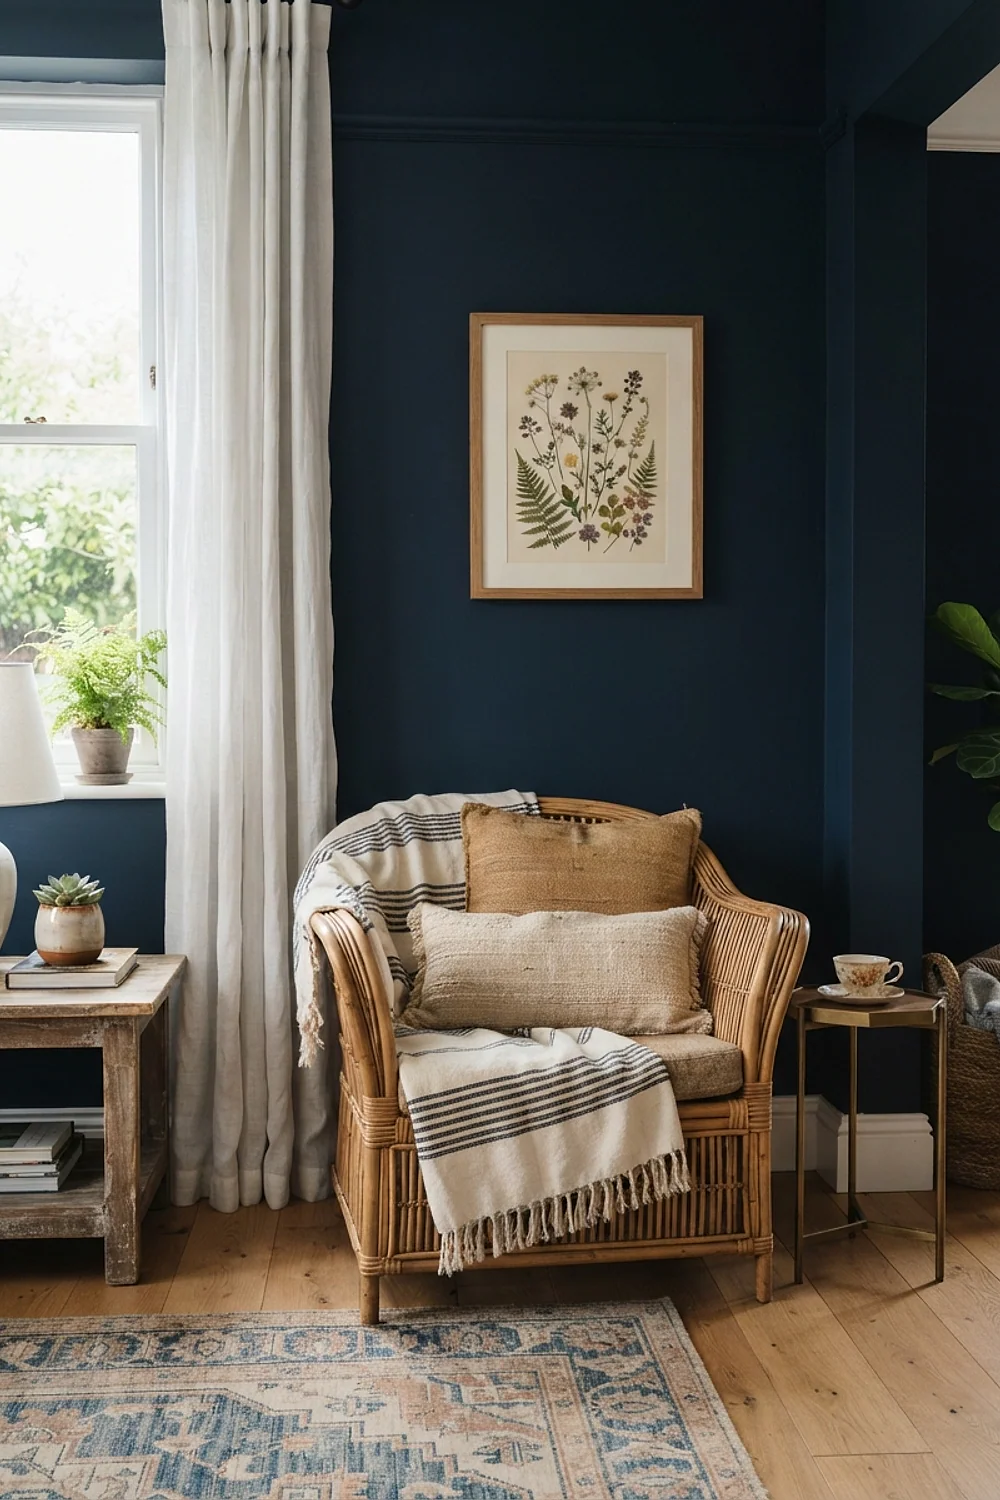
Dried flowers pressed for two weeks in a heavy book, then floated between two glass panes, become delicate wall art. A 2-inch-wide mat gives the arrangement breathing room.
Beginner level, about 45 minutes once the flowers are pressed. Tweezers and a few dots of clear adhesive hold each stem in place.
Dry flowers fully before framing. Trapped moisture breeds mold, and direct sun fades the colors within a year.
A fabric folding screen room divider
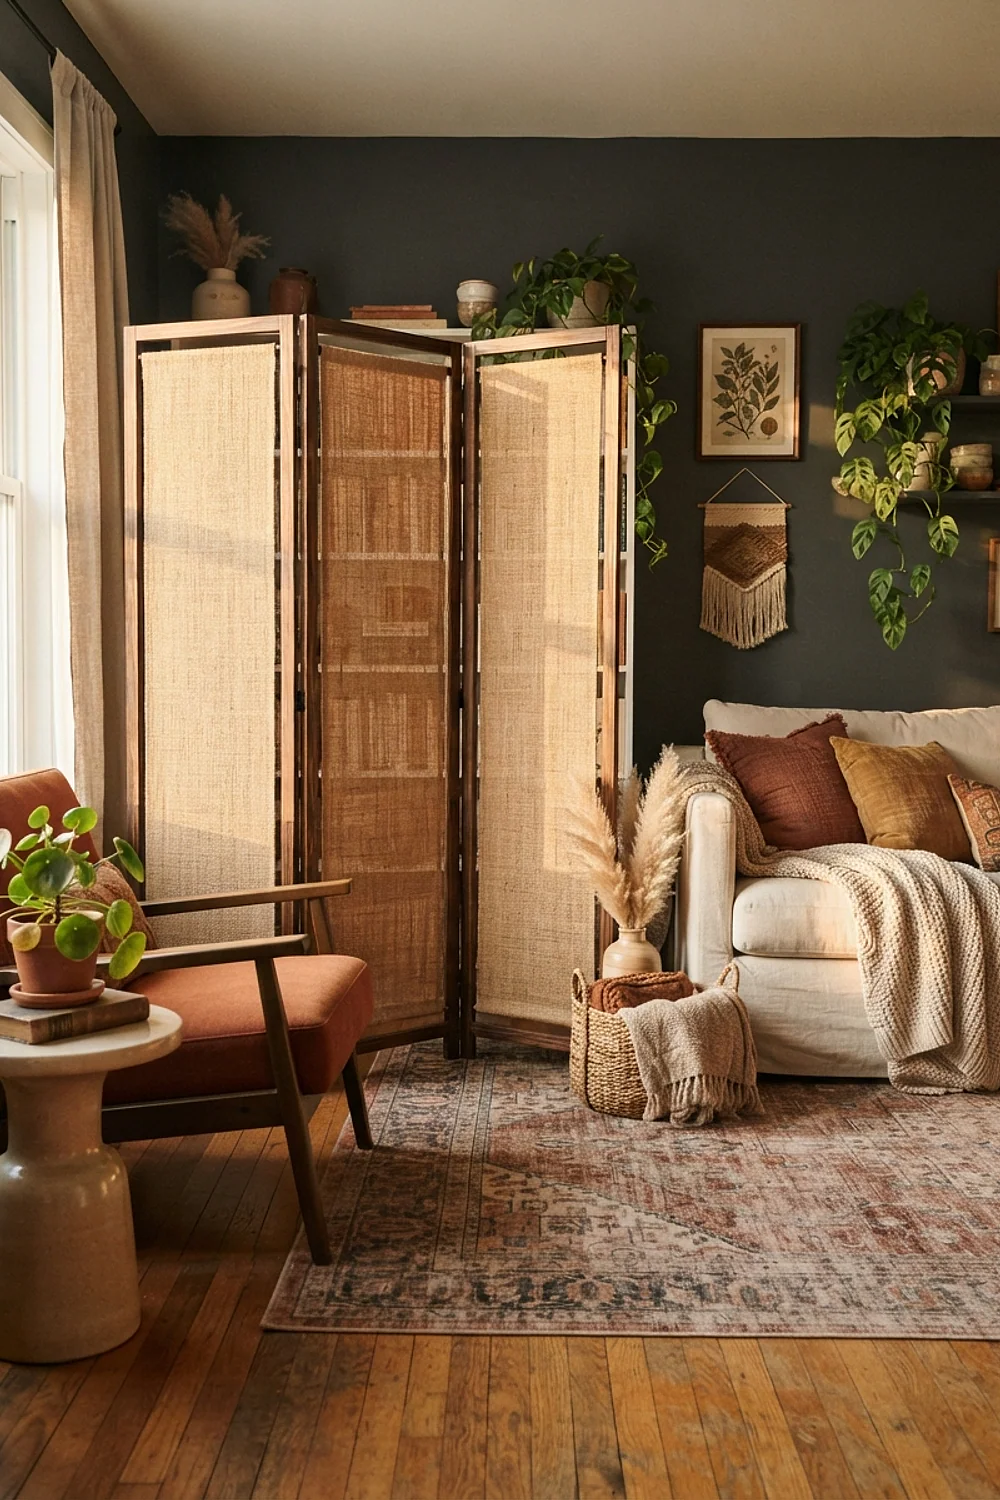
A three-panel screen, each panel 18 inches wide and 60 inches tall, costs about $40 in frames and fabric. It hides a desk or a cluttered corner without a permanent wall.
Intermediate level, about three hours. A staple gun, hinges, and a screwdriver put it together.
Avoid panels narrower than 15 inches. Skinny panels tip over at the first bump from a passing vacuum.
A sand-filled candle tray
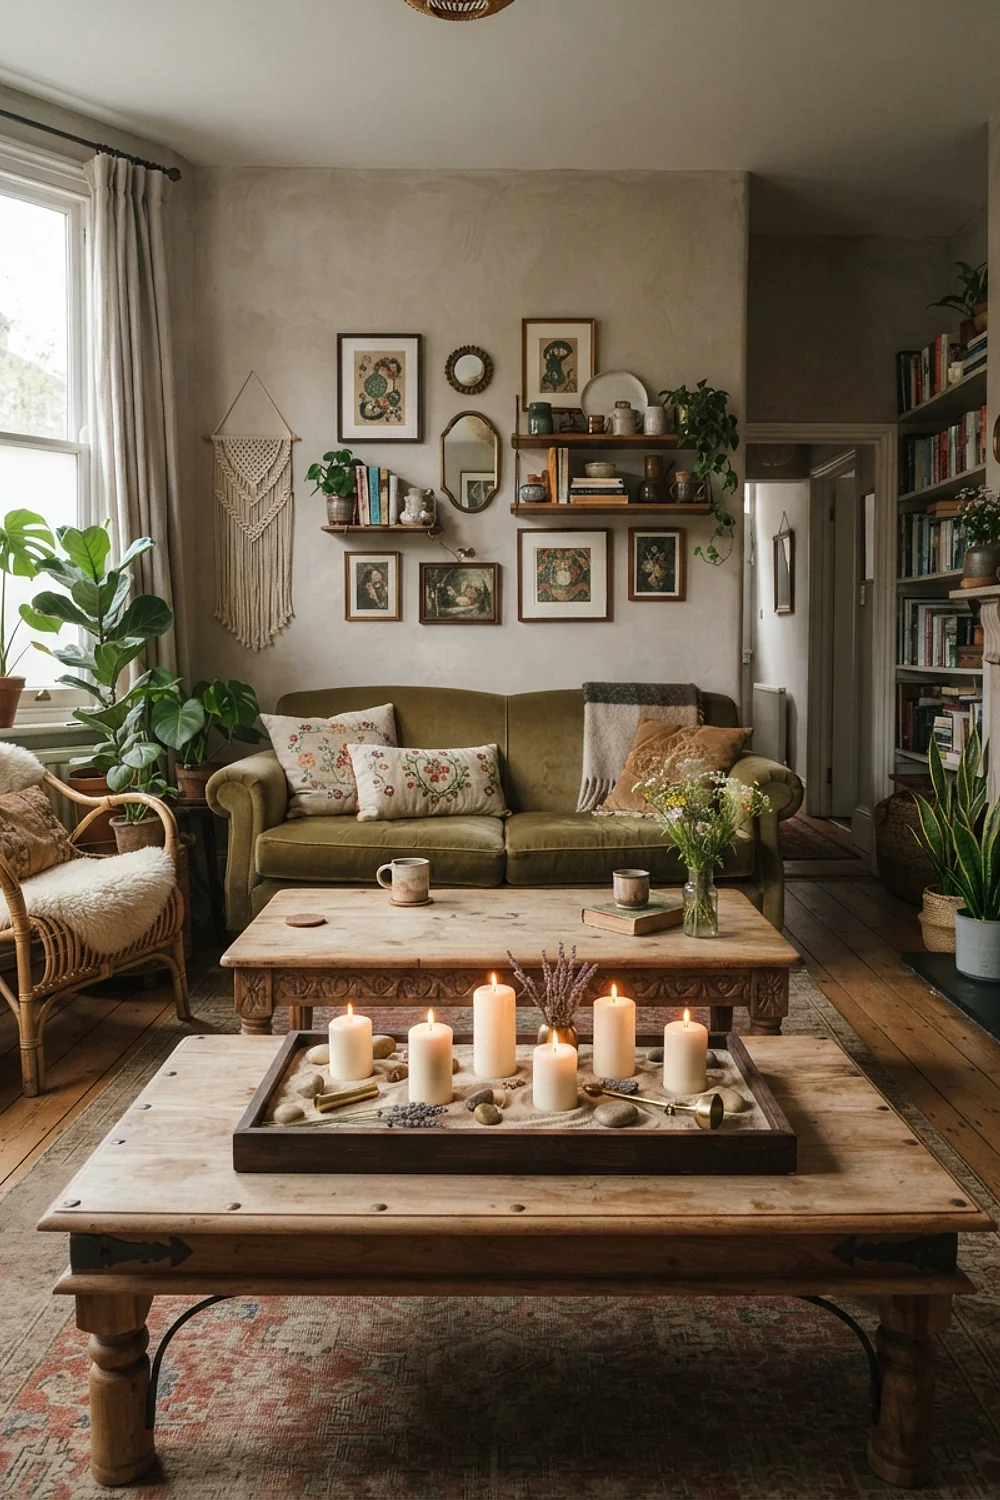
Pillar candles at 3, 5, and 7 inches, clustered on a sand-filled wooden tray, flicker in a way that’s unmistakable at 4:30 on a winter afternoon. Beeswax pillars smell faintly of honey.
Beginner level, about 10 minutes. A shallow tray and a bag of play sand are all you need.
Keep candles at least 2 inches apart and away from curtains. Never leave an open flame unattended.
A rough-sawn cedar shelf with leather straps
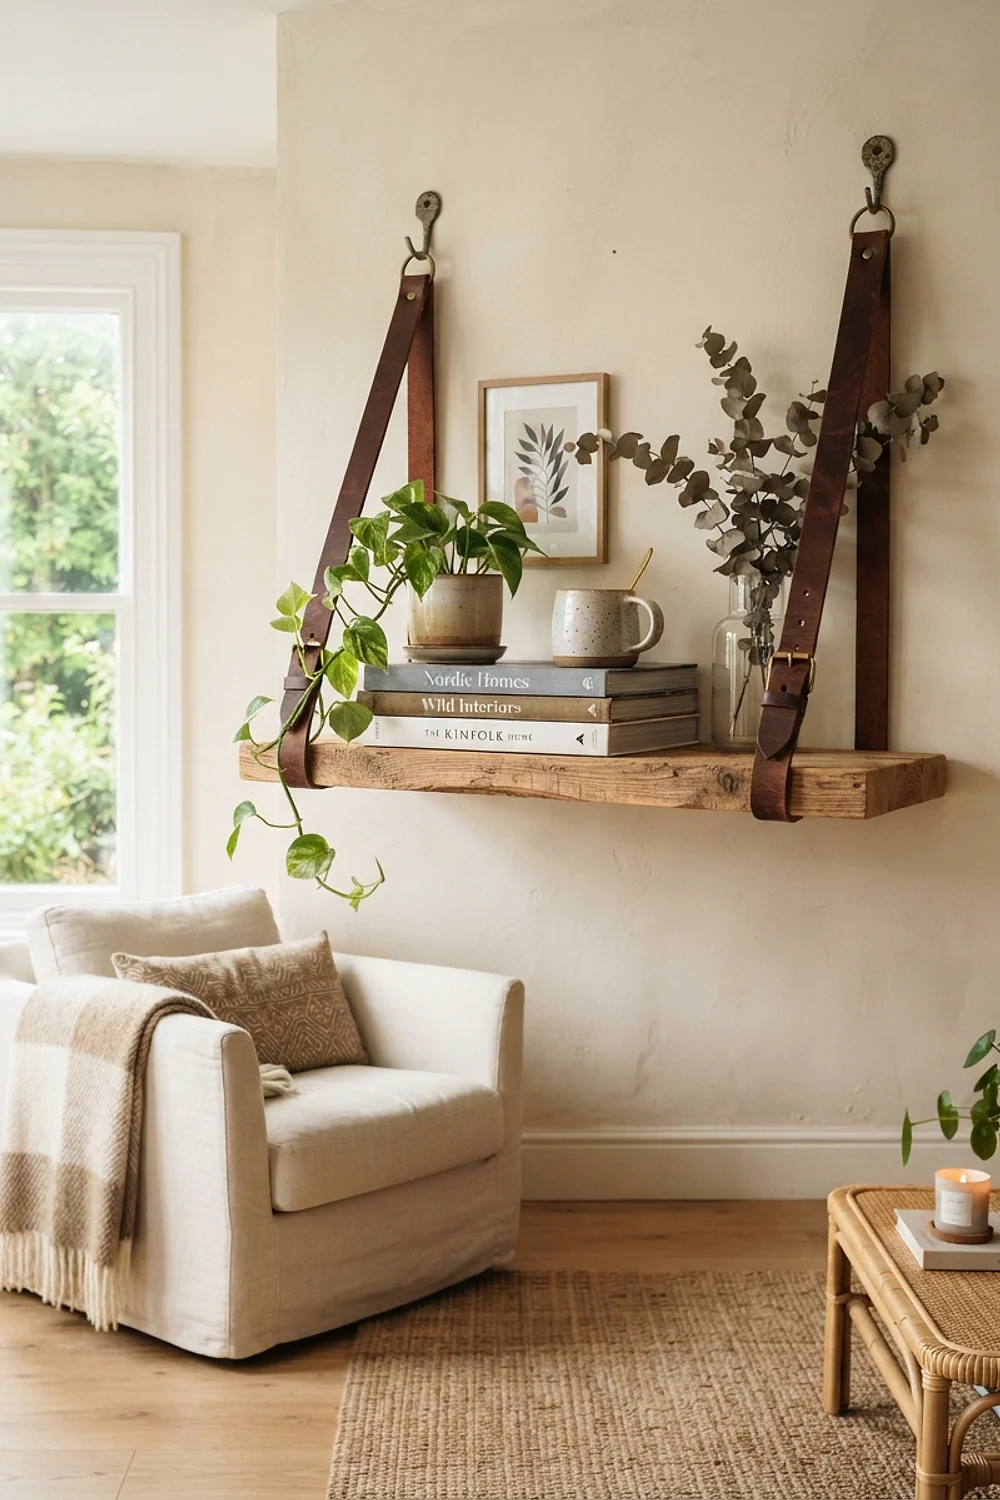
A 4-foot rough-sawn cedar board at about $22, hung with $10 leather straps, smells resinous and looks barely finished in a way that suits boho. Cedar is also naturally rot resistant.
Intermediate level, about an hour. A drill, a level, and screws that reach studs hold it in place.
Limit the load to 15 pounds. Leather straps stretch under heavy books, and the shelf starts to tilt.
A frame-loom wall weaving
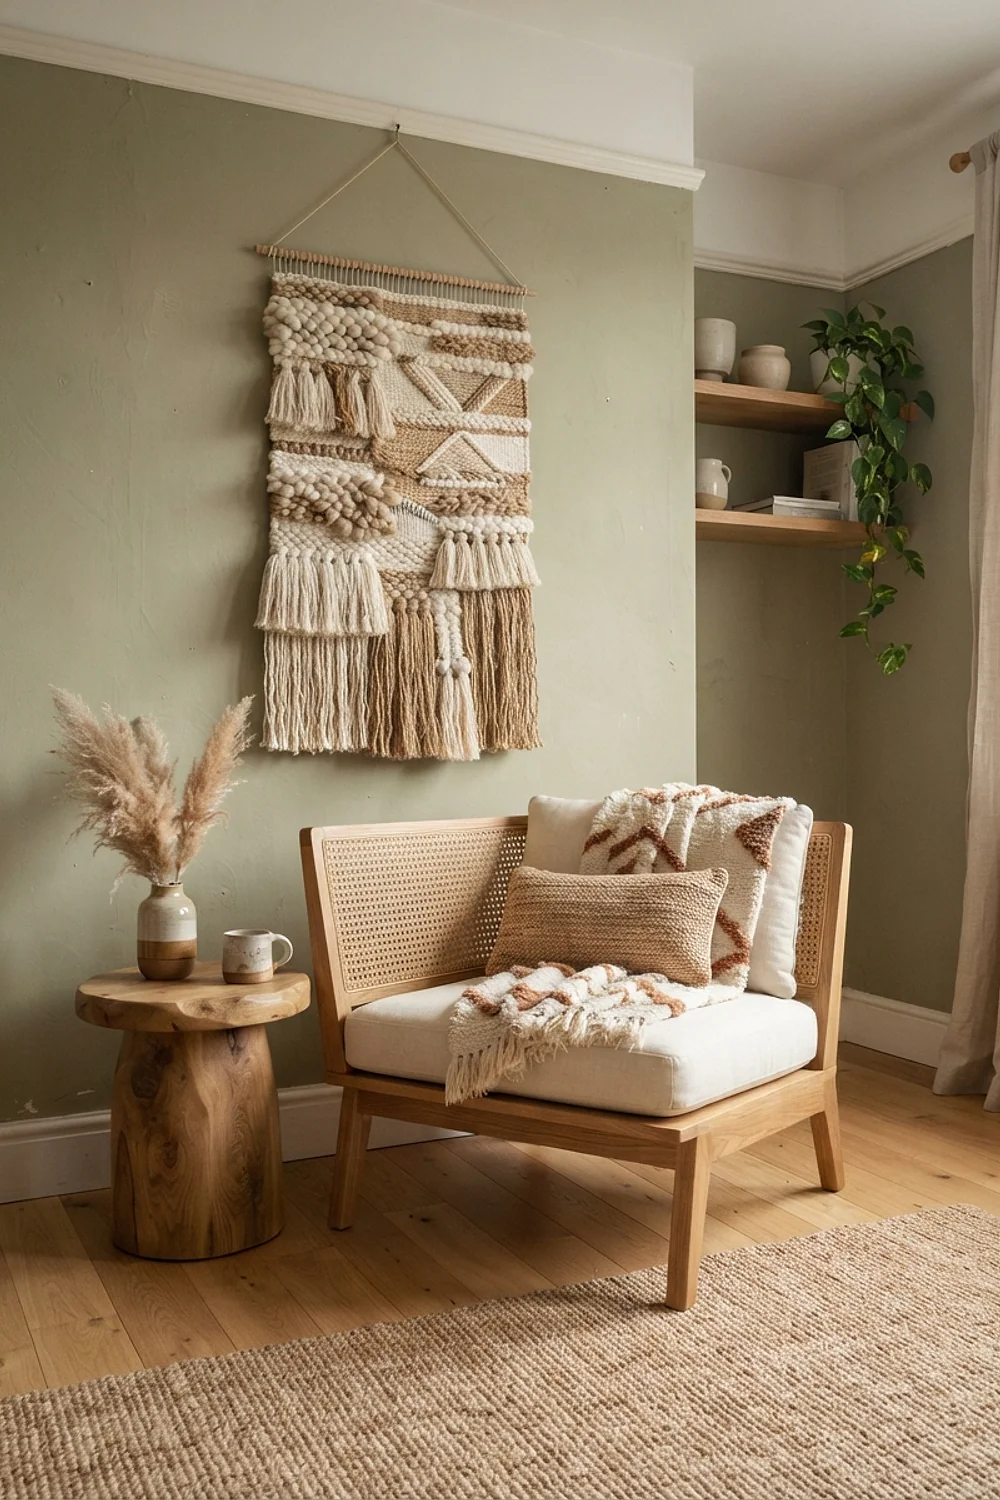
A 30 by 40 inch loom built from stretcher bars, strung with wool roving, fills a big blank wall with texture. Large scale matters here, since small weavings disappear above a full-size sofa.
Intermediate level, four to six hours. You need a tapestry needle, scissors, and a comb to push the rows down.
Keep tension even on the warp threads. Pulling one row tight makes the whole piece curve inward.
Punched-tin lanterns

Tin cans punched with a nail and a hammer throw tiny dotted shadows on a wall, a trick borrowed from backyard decoration that works just as well on a bookshelf. A box of 12 LED tealights costs about $8.
Beginner level, about an hour. Pack each can with damp sand so it doesn’t crush, then punch from the outside.
Space holes at least 1/2 inch apart, and file the cut edge smooth. Use LED tealights, since a real flame in a closed tin overheats.
A hand-sewn bolster pillow
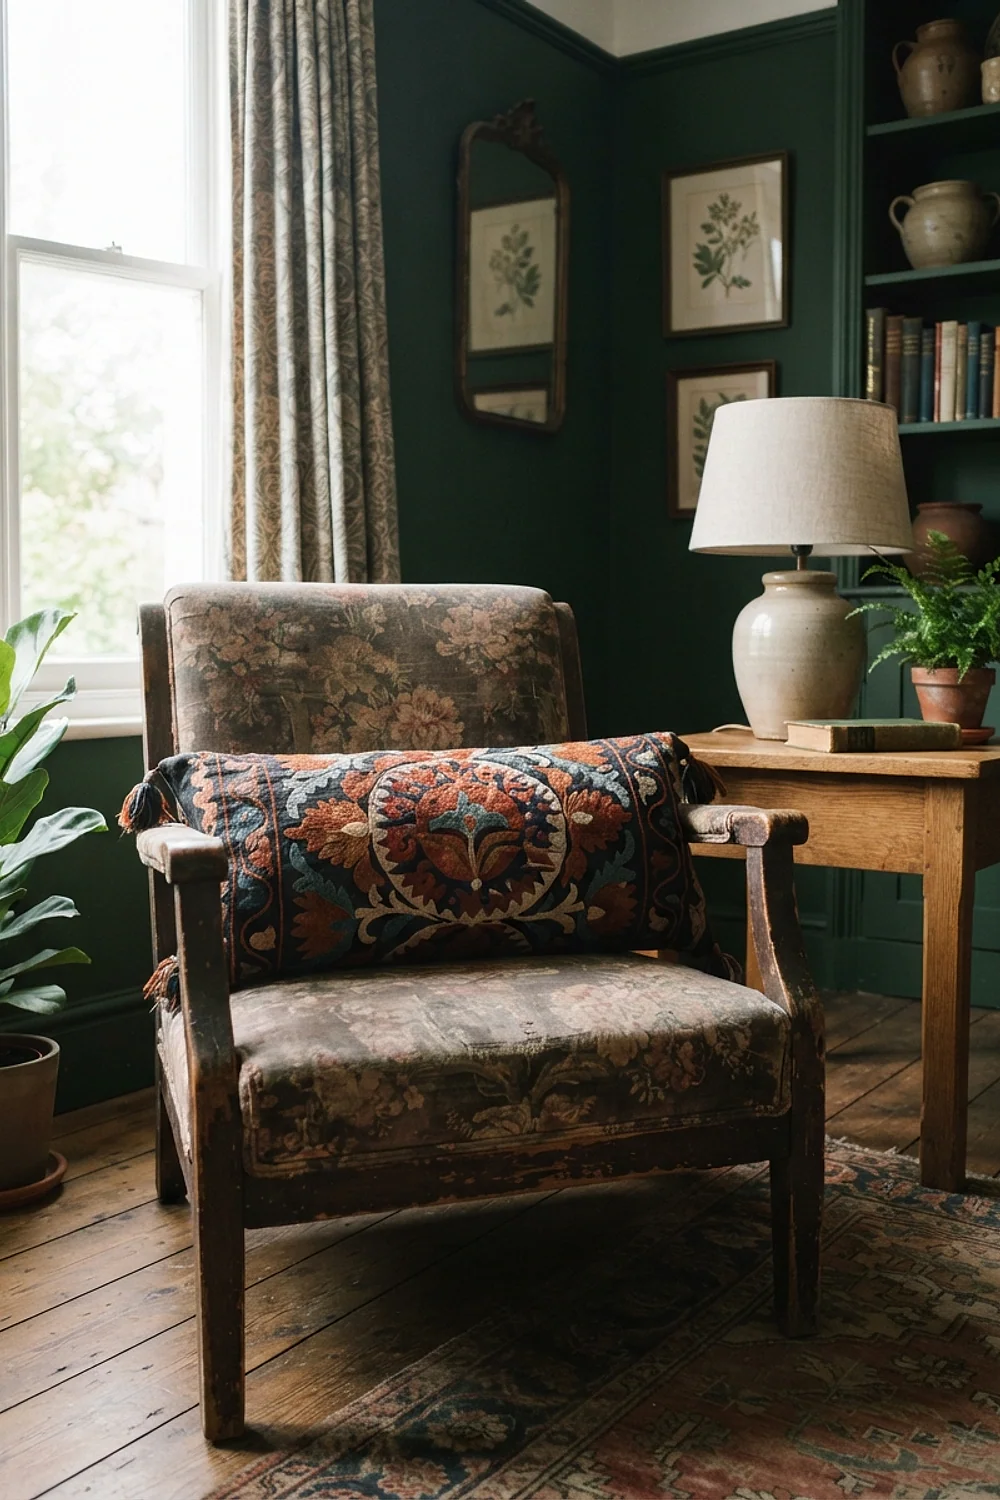
An 8 by 22 inch bolster fills the corner of a sofa and supports the neck on a lazy afternoon. A firm polyester fill holds its shape better than feathers.
Intermediate level, about two hours. A needle, thread, and scissors cover it, and a ladder stitch closes the seam invisibly.
Stuff it more firmly than feels right. Bolsters settle with use, and a soft one collapses into a lumpy sausage in a month.
Shopping guide
A bohemian living room runs on natural fibers, raw wood, and clay, so most of this list lives in the craft aisle and the garden center. A full starter kit runs about $70.
- Scissors, a utility knife, and a tape measure
- A hot glue gun with 20 sticks
- Painter’s tape and a 2-inch angled brush
- Matte acrylic paint in rust, ochre, and cream
- 3mm cotton cord and jute twine
- A drill with a stud finder and a level
- Fine and medium sandpaper
Buy natural cord before synthetic. Cotton and jute hold knots and take dye, while polyester rope slips and looks plastic.
Look, the temptation is to buy every material at once. Pick three projects, buy only what they share, and the rest of the list can wait until the first set is finished.
When DIY isn’t worth it
A bohemian living room doesn’t need every piece made by hand. Some jobs cost more in time, risk, or redo than they ever save.
- Sofa upholstery, since foam, springs, and tailoring take years to master
- Hardwiring light fixtures, which needs a licensed electrician in most areas
- Large area rugs, because a handmade 8 by 10 takes weeks and rarely matches a good vintage one
- Joinery-heavy furniture like dining tables, where a wobble ruins it
Yes, another reminder that your time has a price. It still gets ignored until the third failed attempt.
Secondhand shopping beats DIY for anything structural. A thrifted solid wood dresser has sturdier drawers than a first-time build ever will.
Combining projects without cluttering your bohemian living room
A bohemian living room looks collected, not crowded, so pace the projects. Finish three before starting a fourth.
Follow a simple rule for balance:
- Pick one large piece, such as the arch or the loom weaving.
- Add two medium pieces, like a mirror or a ledge shelf.
- Fill gaps with small items, like pots, candles, and tassel garlands.
Keep every piece within the same three colors. Texture can vary wildly, but the palette should stay tight.
And leave bare wall. Empty space makes the handmade pieces look chosen instead of crammed.
Where to start
Handmade pieces build up slowly, and a few weekends are enough to change the whole room. Start with the project that solves your biggest visual gap, whether that’s an empty wall or a harsh ceiling bulb.
Save or pin this list so it’s easy to find when the next free weekend arrives. Measure the wall above your sofa first, then pick the one macrame, arch, or tapestry project that fits it.
Frequently asked questions
How much does a bohemian living room DIY project cost?
A weekend of three or four projects typically runs $60-150, depending on materials. Cotton cord, terracotta pots, and thrifted frames keep costs low, while foam, wood, and dye kits push it higher.
Can I do these projects in a rental?
Yes, most of them. Choose adhesive hooks, leaning pieces like the ladder rack, and freestanding projects like the pouf, tray table, and folding screen, which leave no wall damage.
What’s the best first project if I’ve never made anything?
Start with the dipped terracotta pots or the tassel garland. Both take under an hour, need almost no tools, and forgive mistakes, so a beginner finishes with something worth showing off.
How do I keep a bohemian living room from looking cluttered?
A bohemian living room stays balanced when it follows one tight palette and leaves some bare wall. Stick to one large piece, two medium ones, and a few small accents, then edit before adding more.